Management of accounts and authorizations¶
Account management involves creating, modifying, and deleting user accounts for the various applications managed within the organization. This involves assigning unique identifiers to users (such as usernames or employee IDs) and managing the information associated with these accounts.
Permissions management consists of granting specific access rights and authorizations to each identity based on their role, responsibilities, organization, and needs within the organization. These authorizations may include access to applications, data, networks, systems, physical resources, etc.
Managing the roles and permissions of an identity involves calculating and assigning permissions to identities in different applications in order to build a theoretical repository of identities and their permissions. This means that all calculated accounts, roles, and authorizations can be provisioned automatically or manually in the various target applications.
Systancia Identity offers the option of managing roles and authorizations either automatically, via authorization rules, or discretionally, via manual rights additions or form requests (workflow).
Management of account types¶
An account type consists of several elements:
- A login policy (mandatory),
- A password policy (optional),
- Account attributes (optional),
- Account statuses defined according to identity statuses
An account type must be linked to a repository and must be linked to a role in order to generate accounts. It is therefore possible to have several accounts on the same repository for the same identity if that identity has several different roles.
Create/modify/delete an account type for a repository¶
Refer to the Object type management page for account type management, configuration of different forms, etc.
Create/modify/delete a login policy¶
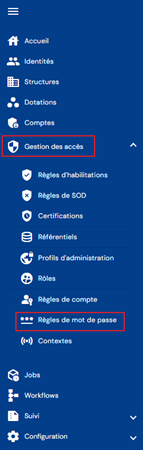
To access login policy management, go to the “Access Management/Account Rules” menu.

You will be taken directly to the list of existing login policies, preloaded in a table with no filters applied.

Pagination is set up to display only 10 login policies.

A search field is available at the top right of the table. The search focuses on the “code” and “name” attributes of login policies.

To create a new login policy, click on the “ ” button.

Enter the parameters for a login policy:
-
Code: code for the login policy. Must be unique, without spaces or special characters. Mandatory.
-
Name: name of the login policy. Label that will be displayed in the various forms of the application. Mandatory.
-
Description: field for entering a description of the login policy. Optional.
-
Formula (primary): calculation formula for defining the login
-
Duplicate policy:
- Automatic increment: The login is calculated using the primary formula and supplemented with a duplicate index. The duplicate index has a 3-digit format.
- Example: Login_Calc002
- Formula (duplicate): custom calculation formula in case a duplicate is detected when calculating the login with the primary formula. You can use the keyword §INDEX_DOUBLON§ to manage the automatic increment but place it in a specific location. Since Identity 7.0 SP3, the §INDEX_DOUBLON§ keyword starts at 1 and has no limit. The duplicate index has a 3-digit format for earlier versions.
- Example: Formula (duplicate) Login2_Calc
Warning: to test the formula with this keyword, you must replace §INDEX_DOUBLON§ with a value. This keyword cannot be interpreted in the formula tester, but works in login calculations.
- Automatic increment: The login is calculated using the primary formula and supplemented with a duplicate index. The duplicate index has a 3-digit format.
-
Action to take if a real account exists:
- Use and reconcile with the real account
- Generate a login with duplicate policy
- Do not generate an account
-
Actions to take if a theoretical account exists:
- Generate a login with duplicate policy
- Do not generate an account

To view and modify a login policy, click on the “ ” icon located to the right in the corresponding table row:

It is possible to switch to edit mode directly from the login policy view page.

In edit mode, all fields can be modified.
Actions on buttons in edit or create mode:
- Cancel: cancels the current entry and switches the page to view mode
- Save: Validate the form and switch the page to view mode
- Save and quit: Validate the form and return to the login policy list page
To delete a login policy, click on the icon “ ” located to the right in the corresponding table row:
A confirmation message will appear before the login policy is deleted.
Warning: it is not possible to delete a login policy as long as it is linked to one or more repositories.
Create/modify/delete a password policy¶
To access password policy management, go to the “Access management/Password rules” menu.
You will be taken directly to the list of existing password policies, preloaded in a table with no filters applied.

Pagination is set up to display only 10 password policies.

A search field is available at the top right of the table. The search focuses on the “code” and “name” attributes of password policies.

To create a new password policy, click on the “” button:

Enter the parameters for a password policy:
- Code: code for the login policy. Must be unique, without spaces or special characters. Mandatory.
- Name: name of the login policy. Label that will be displayed in the various forms of the application. Mandatory.
- Description: field for entering a description of the password policy. Optional.
- Formula: calculation formula for defining the password

To view and modify a password policy, click on the icon “” located to the right in the corresponding table row:

You can switch to edit mode directly from the password policy view page.

In edit mode, all fields can be modified.
Actions on buttons in edit or create mode:
- Cancel: cancels the current entry and switches the page to view mode
- Save: Validate the form and switch the page to view mode
- Save and quit: Validate the form and return to the password policy list page
To delete a password policy, click on the icon “” located to the right of the corresponding table row:

A confirmation message will appear before the password policy is deleted.
Warning: you cannot delete a password policy if it is linked to one or more repositories.
Viewing accounts in a repository¶
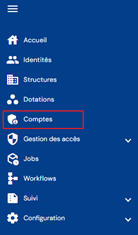
To search for an account, go to the “Accounts” menu.
You will be taken directly to the account search page for a selected repository (the first in the list), preloaded without any filters applied but respecting the permissions associated with the connected user's profile.
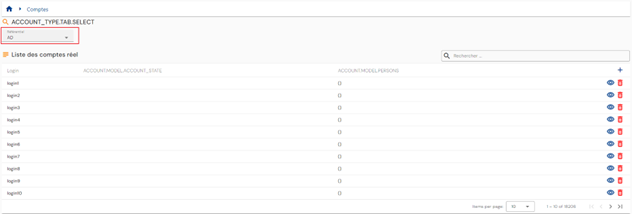
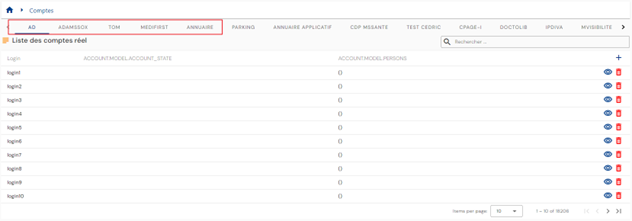
As accounts are linked to a repository, you must select the desired repository either via the tabs or via the drop-down list to display the list of associated accounts.
The display mode is defined according to the number of repositories. Either there are 10 or fewer repositories and they are displayed in separate tabs, or they are listed in a drop-down list.
Pagination is implemented to display only 10 accounts.
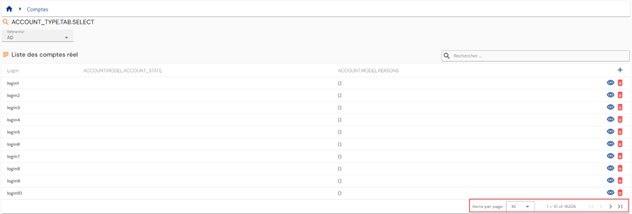
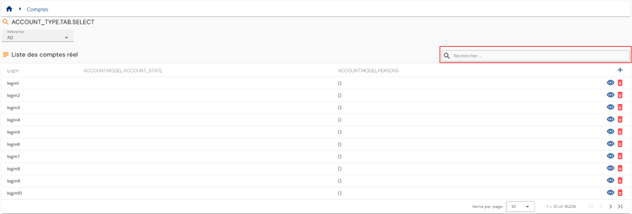
A search field is available at the top right of the table. The search focuses on account logins and takes into account the selected repository.
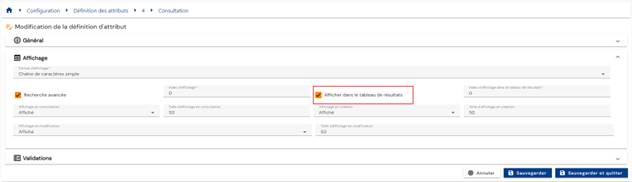
Configure the account search results table¶
To configure the attributes to be included in the account search results table, go to the attribute configuration page, select the “Account” tab, open the desired attribute in edit mode, and check the “Display in results table” option.
Reconcile/dereconcile a theoretical account with a real account¶
To go to the account reconciliation management page, go to the “Accounts” menu and activate the “Reconciliation” option:
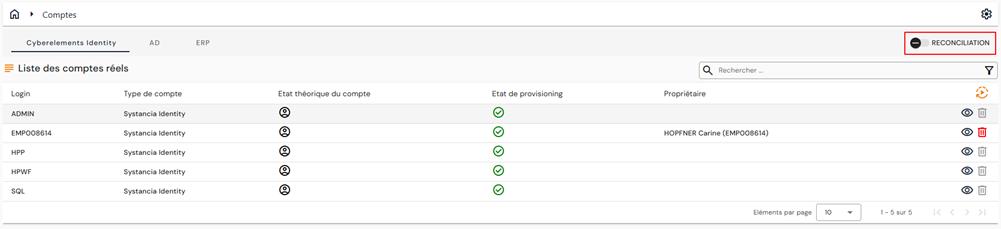
Two new tables will appear in the window:
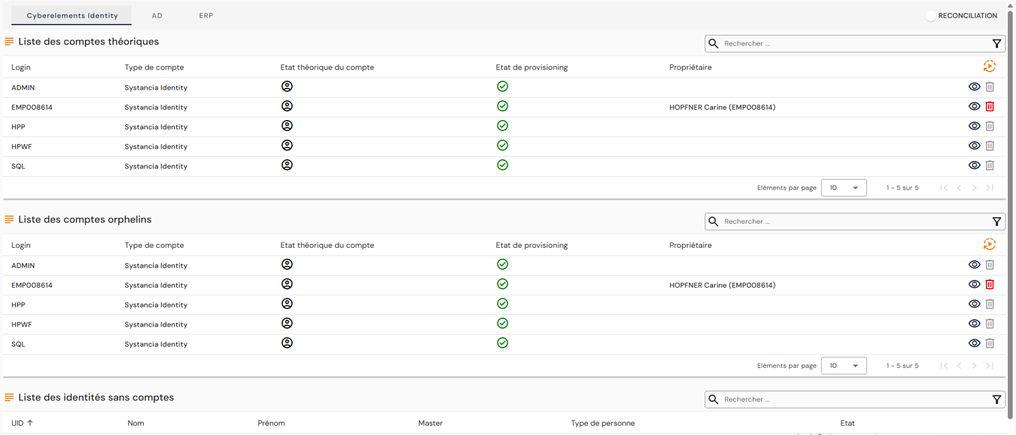
The second table lists orphan accounts in the selected repository. As a reminder, orphan accounts are accounts that have been retrieved from the target repository but are not linked to any identity in cyberelements Identity.
The third table lists the identities that are not linked to any account in the selected repository.
In this table, for each identity without an account, you can:
- Link an existing theoretical account. To do this, click on the
 button to the right of the desired identity, then search for the desired existing theoretical account.
 - Create a theoretical account. To do this, click on the button to the right of the desired identity, then create the theoretical account by selecting the desired account type.
Important note
The feature has been removed from older interfaces because it is not possible to retain both modes.
Discretionary management of roles and authorizations¶
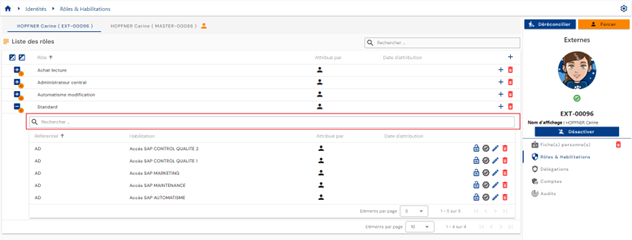
To manually modify role assignments and authorizations for an identity, open the desired identity record in view mode and go to the “Roles and Authorizations” tab.
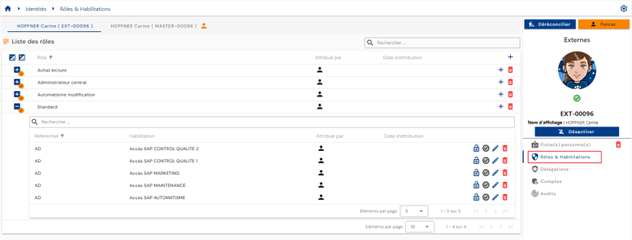
A table containing the roles assigned to the identity is displayed. For each role, a nested table contains the authorizations linked to the identity and assigned to the role. An authorization must be linked to an Identity/Role pair.
If several identities are reconciled, a tab for each identity is displayed, allowing you to select the desired identity. Roles/authorizations are linked to an identity and not to a reconciliation chain. It is therefore necessary to select the desired identity before proceeding with manual updates.
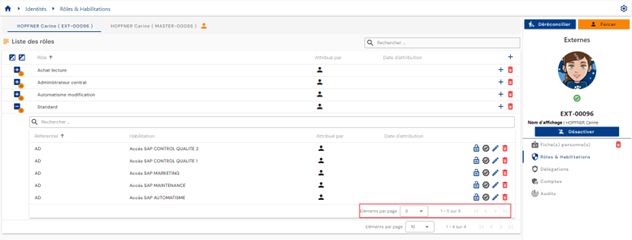
Pagination is set up to display only 10 roles.
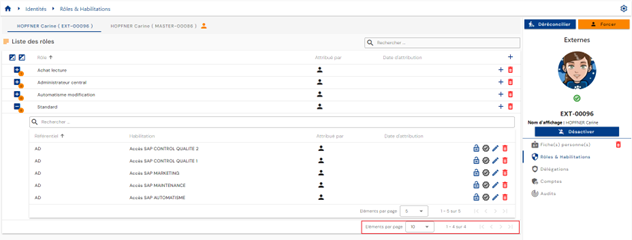
In the table embedded under a role, pagination is set up to display only 5 authorizations.
A search field is available at the top right of the roles table. The search is based on the names of the roles.
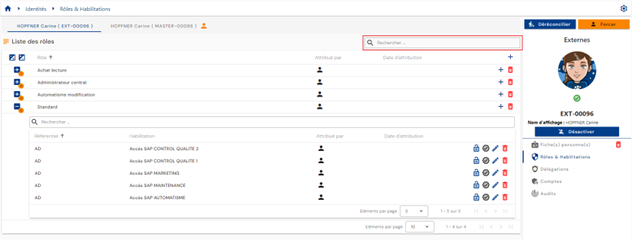
In the table embedded under a role, a search field is available at the top of the authorizations table. The search covers the “Category,” “Code,” and “Name” attributes of authorizations.
You will find the following information in the authorization table:
- Its status:
- “Valid”: the authorization is visible without any special markings
- “Blocked”: the authorization is visible but crossed out in the interface
- Assignment mode. The possible values are
 : Manual with the UID of the identity that performed the assignment
 : Authorization rule with the name of the rule(s)
 : Authorization granted by role inheritance
-
 : The first icon indicates that the right has been added manually (via workflow), and the second allows you to access the workflow (link to the workflow operating interface).
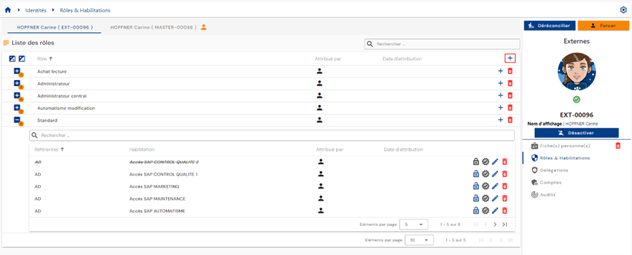
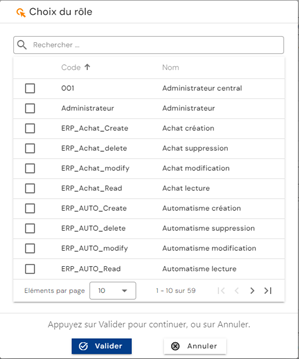
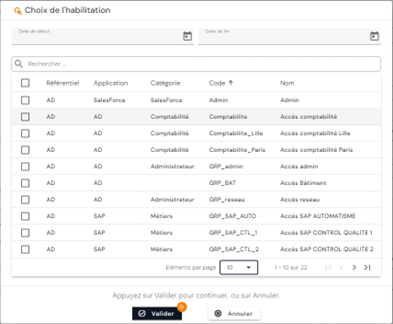
To add one or more roles or to add one or more authorizations to several roles for the same identity, click on the “” button located at the top right of the roles table.
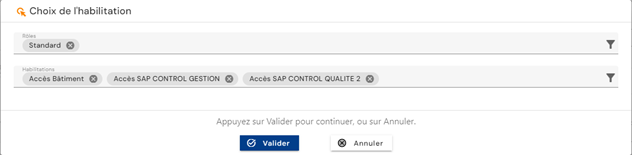
Select the desired role(s) and then click on Confirm to add the roles and proceed to the next step, or Cancel to cancel the operation.
To add one or more authorizations to a role already linked to the identity, click on the “” button located on the right in the corresponding row of the role table.

Select the desired authorization(s) and then click on the “Confirm” button to link them to the role or on the “Cancel” button to cancel the operation. It is possible to set a start and end date that will be applied to all selected authorizations.
-
Action buttons for authorizations:
 : Allows you to block the authorization.
 : Allows you to unblock the authorization.
 : Allows to certify the authorization.
 : Allows to delete the authorization certification.
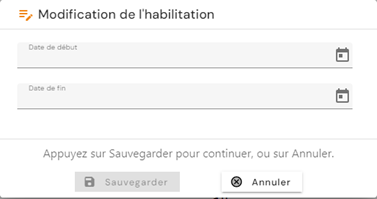
- : Allows to change the application dates. Button accessible for manual rights only.
- : Allows to delete a manual right. A confirmation message is displayed before proceeding with the removal of the authorization.
Warning: The button to delete an authorization is only present if the authorization has been assigned on a discretionary basis only. The authorization may still be visible in “pending deletion” status if its provisioning status is “provisioned.”
To unlink a role from an identity, click on the “” icon located to the right of the corresponding row in the roles table.

A confirmation message will appear before the role is deleted.
Warning: The button to delete a role is only present if the role has been assigned on a discretionary basis. All authorizations linked to the identity/role pair will also be unlinked and deprovisioned at the next synchronization in the case of automatic provisioning.
Management of authorization rules¶
Authorization rules allow you to configure access policies and automatically assign rights to identities identified by the rule.
An authorization rule consists of associating:
- on one side, a population of users, defined by filtering on roles (RBAC), organizations (OrBAC), and/or attribute values (ABAC),
- on the other side, roles and application rights.
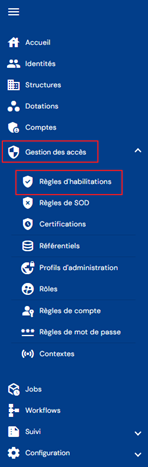
To access authorization rule management, go to the “Access Management / Authorization Rules” menu.
You will be taken directly to the page listing the existing authorization rules, preloaded without any filters applied but respecting the authorizations linked to the profile of the person connected.
Pagination is set up to display only 10 rules.

A search field is available at the top right of the rules table. The search is based on the names of the rules.

To create a new authorization rule, click on the “” button.

The creation of a rule consists of three parts:
-
General settings
- Name: name of the authorization rule. Mandatory.
- Description: field for entering a description of the authorization rule. Optional.
- Context: select one or more contexts from the drop-down list containing previously created contexts.
-
List of criteria: click on the “ ” or “ ” buttons to add a filtering rule for the identities that will be included in the authorization rule. A filtering rule consists of defining an attribute to which a filter is to be applied, the comparison operator, and the values to be compared.
- The “” button allows you to add a new filter at the same level as the previous filter.
- The “
 ” button allows you to add a group of filters at the same level as the previous filter. It is mandatory to add filters or groups of filters to a group using the “” or “” buttons in the group.
 - At each filter level, you must specify the operator to be applied between each filter rule.

- An object on which you want to perform a comparison. This can be:
- A role
- A person attribute
- A structure attribute
- A resource attribute
- Comparison operator. The list of comparison operators is dynamic and depends on the type of object selected.
- A value to compare: to be entered or selected from a drop-down list, based on the type of object selected and the comparison operator.
- The “
You can add as many filter criteria as you wish. Operators such as “AND” or “OR” must be determined between each filter rule. Subgroups can be created to increase the number of possibilities.
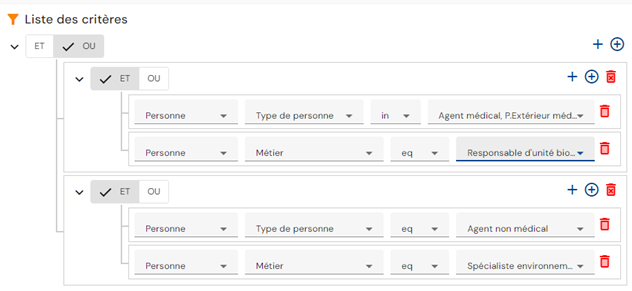
Example: To create the following filter rule:
(Person type = “Medical agent or External medical agent” AND “Job” attribute = “Biological unit manager”) OR (Person type = “Non-medical agent” AND “Job” attribute = “Environmental specialist”)
The filter criteria will be configured as follows:
- Roles and authorizations to be assigned in the authorization rule: There are two tabs for displaying the roles and authorizations to be included in the authorization rule. The Role tab displays the list of roles and briefly indicates the related authorizations, if any. This is also the tab from which roles and authorizations can be added or removed. The Authorizations tab displays the list of authorizations added to the rule with the associated role(s) for each one. This tab simply offers another view.
- To add roles and authorizations to the authorization rule, click the “” button in the “Roles” tab. You must select at least one role, then select authorizations if you wish.
- To add roles and authorizations to the authorization rule, click the “
The list of authorizations is filtered according to the selected roles (a role is linked to one or more repositories).
To view and modify an authorizations rule, click on the “” icon located to the right in the corresponding table row:

View mode allows you to view the details of an authorization rule and also the list of identities affected by the rule.
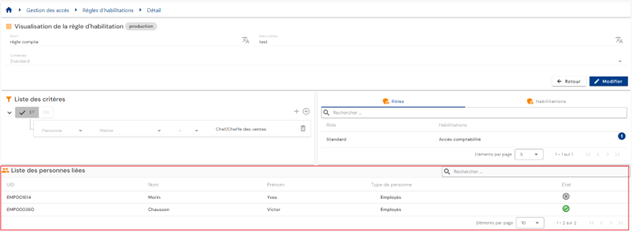
You can search for a person using the search field at the top right of the table.
You can switch to edit mode by clicking on the “Edit” button.
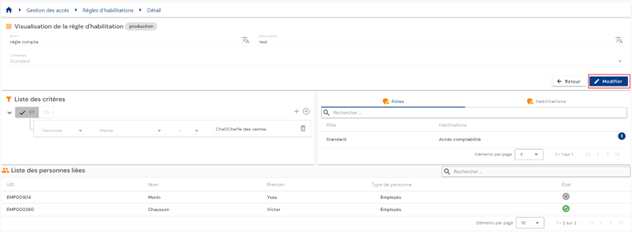
In edit mode, all fields can be modified.
Please note: the list of persons affected by the rule is not updated in real time when a rule is modified. It is updated once the rule has been validated and the calculations have been completed.
Actions on the buttons in create and edit mode:
- Cancel: cancels the current entry and switches the page to view mode
- Save: validates the form and switches the page to view mode. Calculations are performed automatically.
- See Impact: displays the impacts of creating or updating the rule. The impacts are displayed in two tables:
- The first table lists the impacts of the rule on rights, taking into account only the authorization rule that was created or modified. All identities that match the criteria are displayed, including those who have already been assigned the permission elsewhere. Thus, if the person does indeed lose their rights following the change to the authorization rule, they may still retain them by other means.
- The second table lists the overall impacts of the rule on rights. This section takes into account all rules in Systancia Identity, discretionary rights assignments, and rights blocked by a rights separation rule. If an identity has already been assigned the permission elsewhere, the account will not be included on this list. The rights that will actually be affected/deleted when the change is validated are displayed.
In this second table, it is possible to apply a delay before actually deleting the right (application of a bevel or overlap period).
To delete an authorization rule, click on the “” icon located to the right in the corresponding table row:

A confirmation message is displayed before proceeding with the deletion of an authorization rule.
The “ ” icon identifies an authorization rule that is currently being calculated. If it is grayed out, it means that the calculations are complete.
Management of segregation of duties (SoD) rules¶
Segregation of duties (SoD): is an essential security principle that involves dividing responsibilities and privileges within an organization or system to minimize risks and prevent conflicts of interest. It is implemented to ensure the responsible and secure use of IT systems and company resources.
A segregation of duties rule consists of:
- Defining a priority group
- Adding authorizations to the priority group with a priority weight
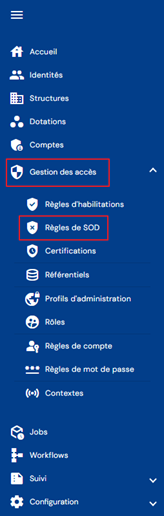
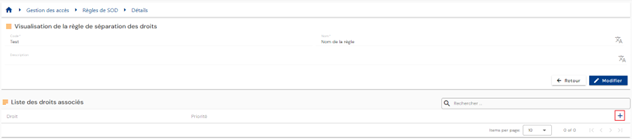
To access segregation of duties rule management, go to the “Access Management / SoD Rules” menu.
You will be taken directly to the page listing the existing separation of duties rules, preloaded without any filters applied but respecting the authorizations linked to the profile of the person connected.
Pagination is set up to display only 10 rules.

A search field is available at the top right of the rules table. The search is based on the name of the priority groups (=name of the rights separation rule).

To create a new rights separation rule, click on the “” button:

There are two steps to creating a rights separation rule.
First, enter the general parameters:
- Code: code for the rights separation rule. Mandatory.
- Name: name of the permissions rule. Mandatory.
- Description: field for entering a description of the rights separation rule. Optional.

Save the creation form to proceed to the second step, adding authorizations.
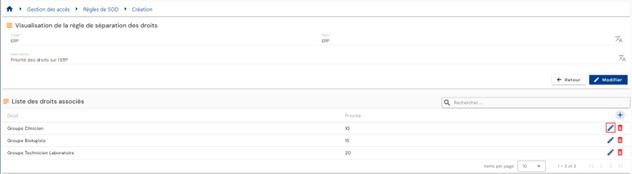
To add an authorization to the SoD rule, click on the “” button in the “List of associated rights” table.
Select the desired authorization and enter a weight to define the priority. The smaller the value, the higher the priority.
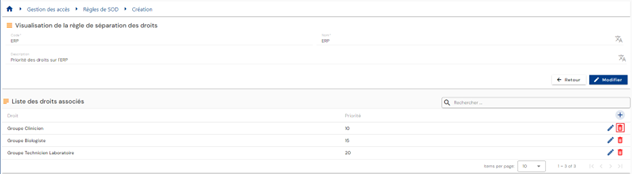
To modify an authorization in the SoD rule, click on the “” button located to the right in the corresponding table row.
You can modify the authorization and/or the priority weight.
To delete an authorization in the SoD rule, click on the “” button located to the right in the corresponding table row.

To view and modify a segregation of duties rule, click on the “” icon located to the right in the corresponding table row.

You can switch to edit mode by clicking on the “Edit” button.
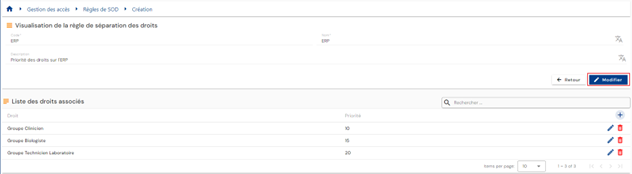
In edit mode, only the name and description can be modified
To delete a separation of duties rule, click on the icon “” located on the right side of the corresponding table row.
A confirmation message is displayed before proceeding with the deletion of an authorization rule.
Submit claims for rights using forms¶
Submit a claim for rights¶
Requests for authorizations for a person (or yourself) are made in the old operating console via the “Run an ‘On demand’ workflow” menu.
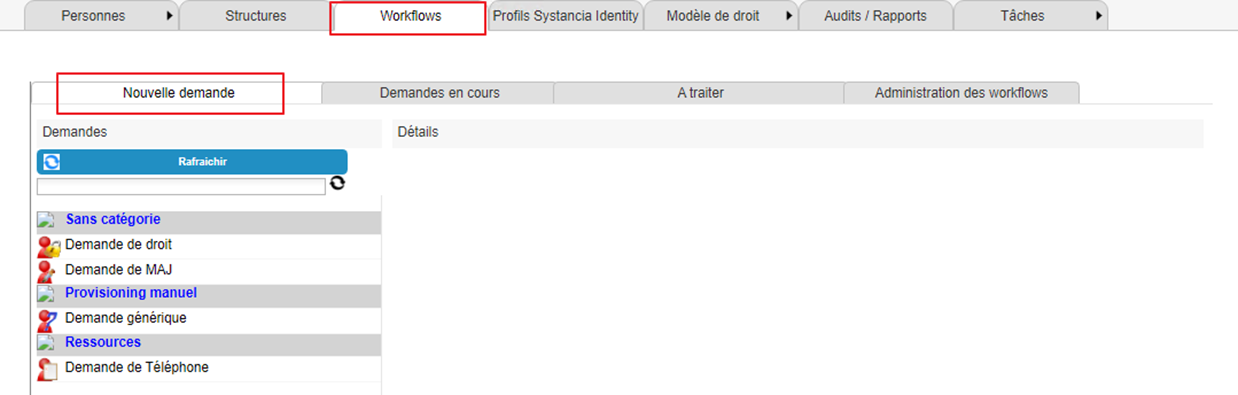
Click the “Refresh” button to display the list of available workflows.
Click on the workflow of your choice to submit an authorization request.
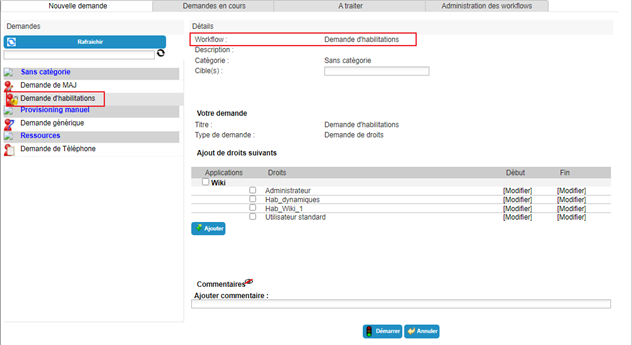
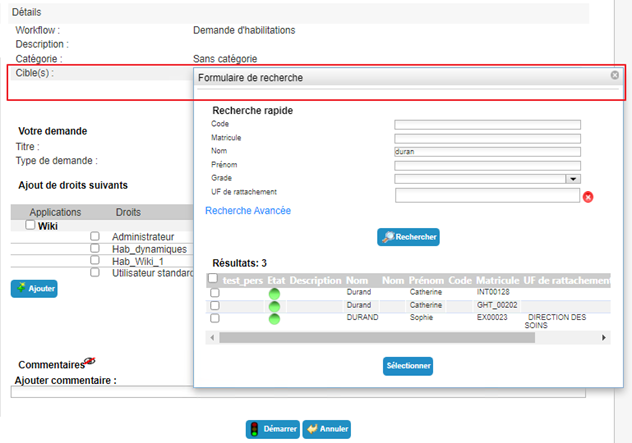
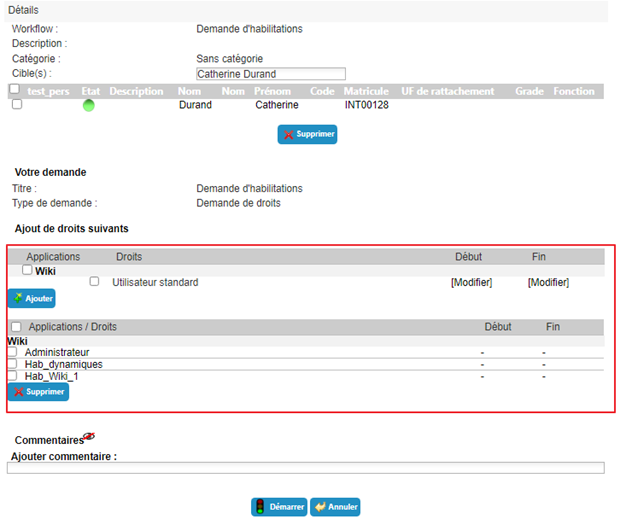
Select one or more identities to which the request refers.
Select the desired authorizations from the available list. Specify start and end dates if necessary.
Click on the “Add” button.
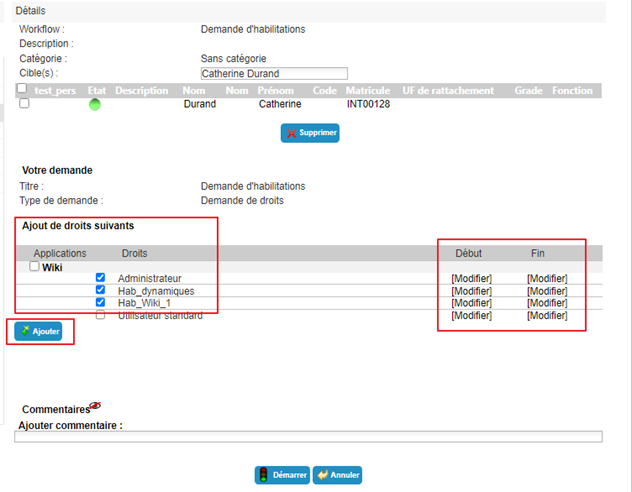
You can add or remove authorizations as you wish. If you want to add application dates to an authorization that has already been selected, you must delete it and then add it again with the dates entered beforehand.
Click on the “Start” button and confirm the pop-up window.
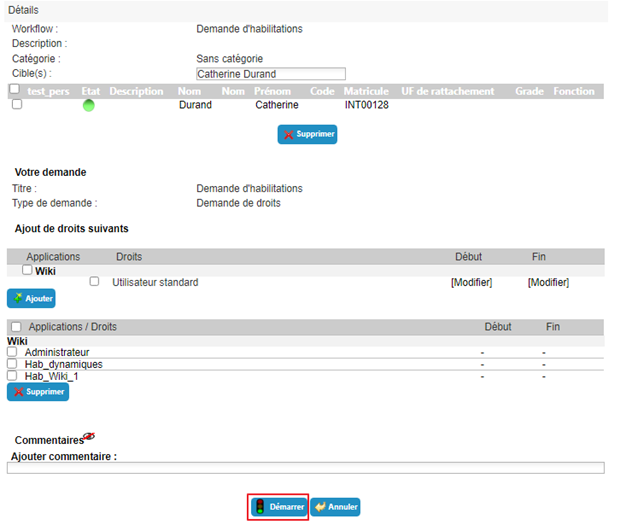
After confirming the execution of the workflow, you will be automatically redirected to the page where you can view pending requests.
Submitting a request for manual provisioning (or deprovisioning) of an authorization¶
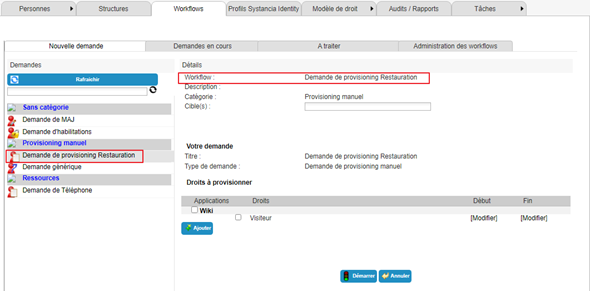
Requests for manual provisioning (or deprovisioning) are submitted in the old operating console via the “Run an ‘On demand’ workflow” menu.
Click the “Refresh” button to display the list of available workflows.
Click on the workflow of your choice to submit a provisioning request.
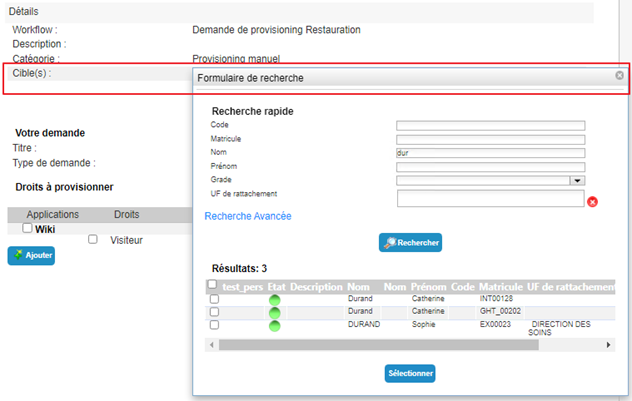
Select one or more identities to which the request refers.
Select the desired authorizations from the available list. Specify start and end dates if necessary.
Click on the “Add” button.
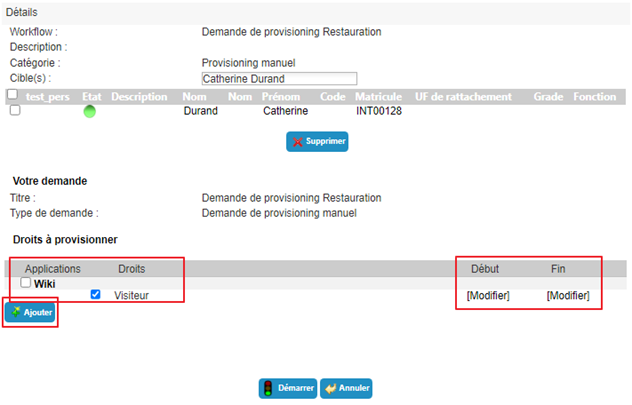
You can add or remove authorizations as you wish. If you want to add application dates to an authorization that has already been selected, you must delete it and then add it again with the dates entered beforehand.
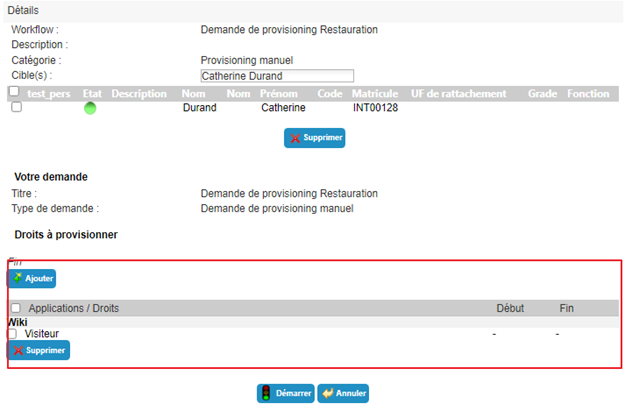
Click on the “Start” button and confirm the pop-up window.
After confirming the execution of the workflow, you will be automatically redirected to the page where you can view pending requests.
Delegating authorizations¶
Delegating authorizations allows you to assign rights from one person (delegator) to another (delegatee), generally for a temporary period.
This feature is available to delegators (depending on the permissions of the person connected) but, as of version 7.0, a third party (depending on the permissions of the person connected) can also delegate rights to another identity (for example, an administrator).
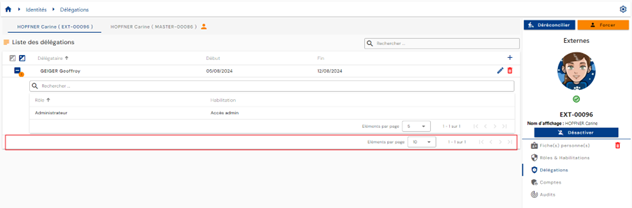
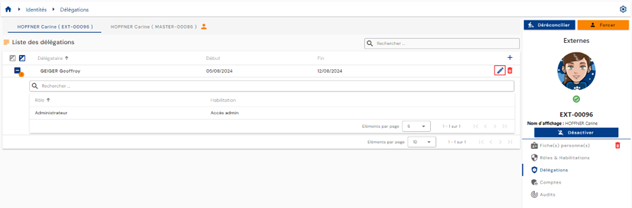
To access the authorization delegation feature, open the desired identity file in view mode and go to the “Delegations” tab.
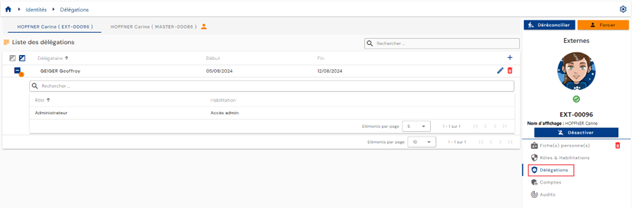
Pagination is set up to display only 10 delegation rules.
To add a delegation, click on the “” button located at the top right of the delegation table.
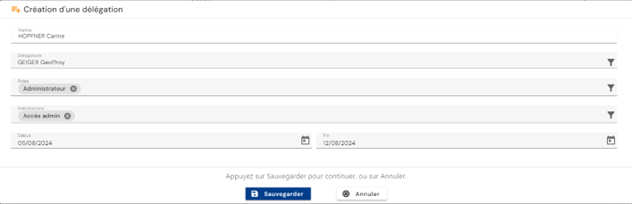
Enter the following information to create a delegation:
- The delegatee: the person receiving the delegated roles and/or authorizations (required)
- The delegated role(s) (required)
- The delegated authorization(s) (optional)
- The start and end dates for the delegation (optional)
To modify delegations, click on the “” icon located on the right in the corresponding row of the table.
You can modify all parameters.
To delete a delegation, click on the “” icon located on the right in the corresponding row of the table.

A confirmation message will appear before the delegation is deleted.
Certification campaign management¶
Certification campaigns are carried out to conduct a comprehensive review of the authorizations assigned to individuals. It is recommended that certification campaigns be carried out regularly across all reference systems to ensure that the authorizations assigned are indeed appropriate.
How a certification campaign works:
The authorizations concerned by the certification campaigns must be configured by the administrator in advance. The configuration of authorizations will indicate the certifier(s) and the duration of the certification campaign.
When a certification campaign is created, all individuals linked to the authorizations configured for certification and belonging to the selected applications will be listed and must undergo authorization certification.
There may be one or more certifiers for the same right.
Viewing a certification campaign¶
To access the certification campaign viewing page, go to the “Right Template \ Certification Campaign” menu.

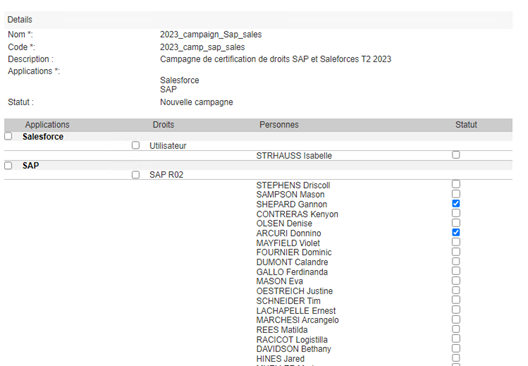
The certification campaign viewing screen is as follows:
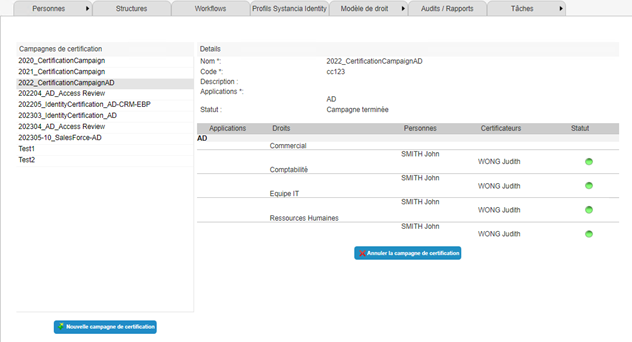
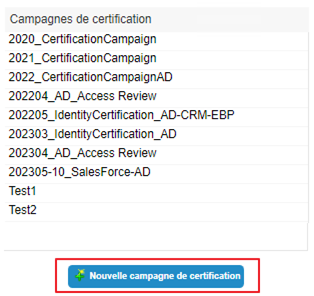
- Certification campaigns are located on the left side of the screen.
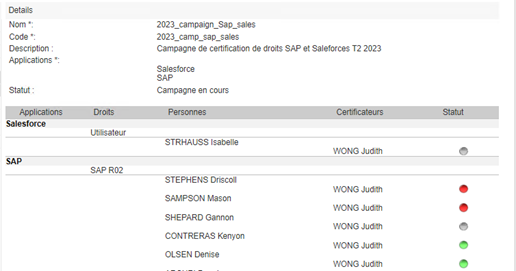
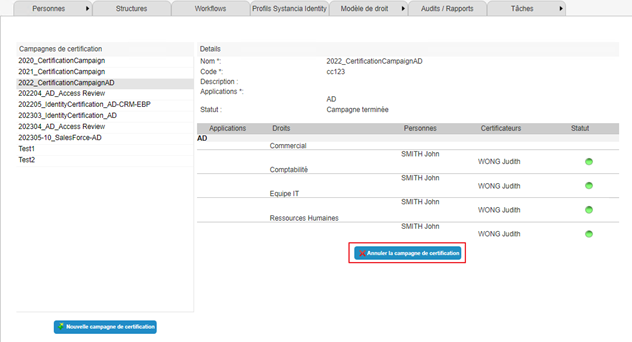
- The right side of the screen is used to view certification campaign details or process certification requests. All campaign information is displayed here:
- Name
- Code
- Description
- Applications
- Status. Three campaign states are managed:
- New campaign: The campaign has just been created. No certifier has made a decision on the campaign yet. The “Certify rights” button is visible to certifiers. See section “Processing a certification campaign”
- Current campaign. At least one of the certifiers has already made a decision on the campaign. The “Certify rights” button is visible to certifiers. See section “Processing a certification campaign”
- Campaign completed. All certifiers must have made a decision on the campaign in order for it to acquire this status. The campaign is still visible but can no longer be modified. It can be deleted by the campaign initiator. See section “Canceling a certification campaign”
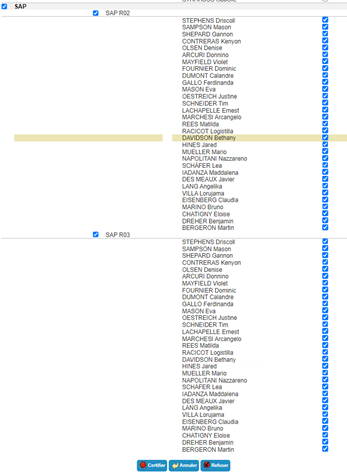
- Table of authorization/person pairs to be certified, sorted by application. It also lists the certifiers associated with each authorization/person pair. The status column shows three different statuses:
- Grey dot: the authorization has not yet been checked
- Green dot: the authorization has been checked and certified
- Red dot: the authorization has been checked and canceled
Create a certification campaign¶
You can access the certification campaign creation page from the certification campaign consultation page.
Click on the “New certification campaign” button.
Fill in the form with the following information:
- Name: the name you want to give to the campaign. Mandatory.
- Code: code on the certification campaign. Mandatory.
- Description: free text to describe the purpose of the certification campaign. Optional.
- Applications: select the applications to be included in the certification campaign. There may be several applications from different repositories in the same certification campaign.
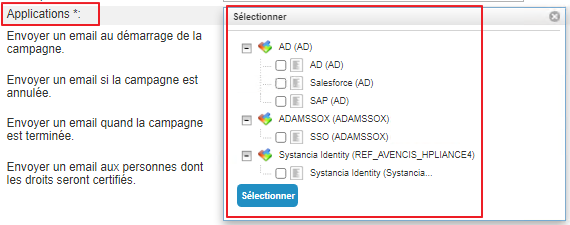
- Notifications: notifications can be sent at four stages of the certification campaign.
- Notification at the start of the campaign
- Notification in the event of campaign cancellation
- Notification when the certification campaign status is “Completed”
- Notification sent to individuals when one of their authorizations is certified.
To create the various notifications, go to the section Configure a certification campaign notification.
Click on the “Save” button to save the certification campaign.
Click on the “Cancel” button to cancel the form entry.
Cancel a certification campaign¶
You can access the certification campaign cancellation page from the certification campaign consultation page.
Select the certification campaign you wish to cancel and click on the “Cancel certification campaign” button.
Note: Only the person who created the certification campaign can cancel it.
Processing a certification campaign¶
You can access a certification campaign for processing from the certification campaign view page.
Select the certification campaign you want to process and click on the “Certify rights” button.
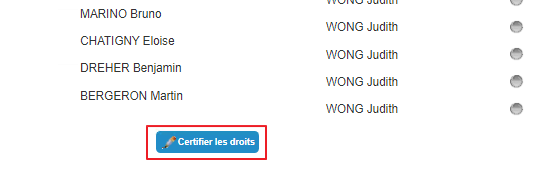
Click on the “Certify rights” button to process a campaign.
The authorization table/list of persons switches to edit mode.
Only non-certified authorizations can be checked. The same certifier cannot modify the actions performed on an authorization/person pair.
Authorization/person pairs that have already been processed have a dot instead of a checkbox:
- green if the right is certified
- red if the right is canceled

To certify an authorization for a person, click the checkbox in the “Status” column of the table opposite the desired person. Then click the “Certify” button.
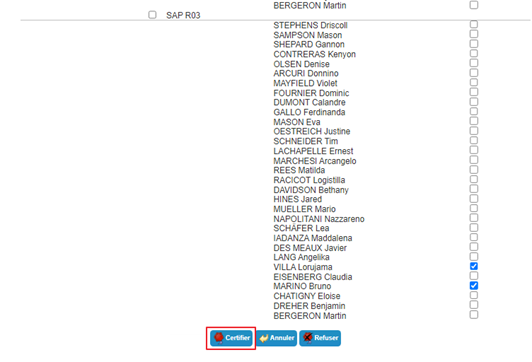
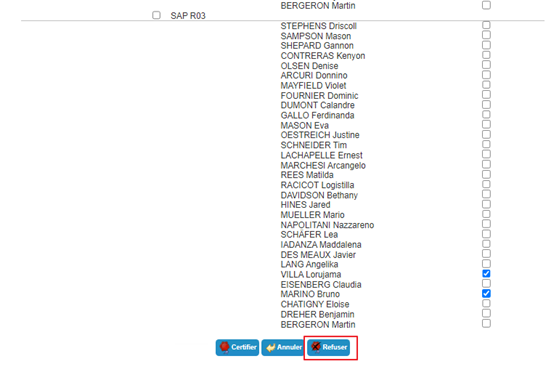
To cancel an authorization for a person, click the checkbox in the “Status” column of the table opposite the desired person. Then click the “Deny” button.
To select all persons linked to an authorization with a single click in order to validate or cancel an authorization, you can select the checkbox in the “Rights” column.
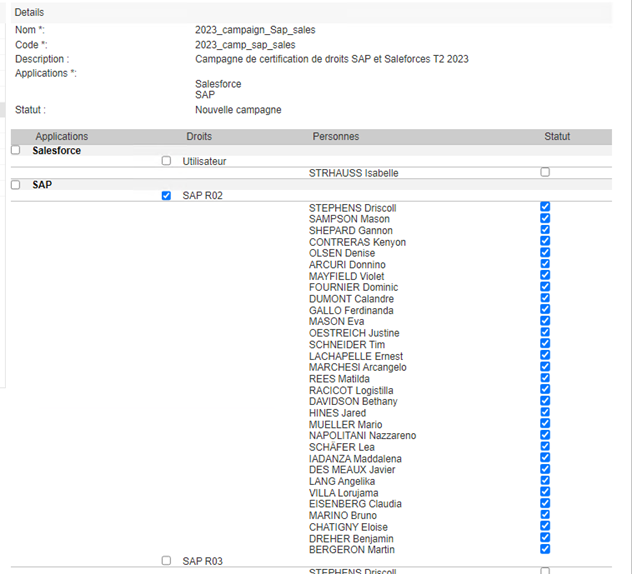
To select all authorization/person pairs in an application in order to validate or cancel an authorization, you can select the checkbox in the “Applications” column.
Note: when there are several certifiers for authorization/person pairs, if at least one of the certifiers has canceled the authorization, then the authorization will be in “Blocked” status.
Configure a certification campaign notification¶
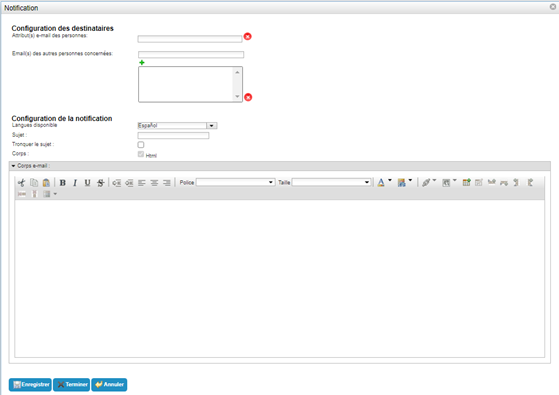
The certification campaign notification configuration form has the same format for the four different possible notifications.
The following information must be entered:
- Configuration of the recipients
- Email attribute(s) of individuals: select the attribute(s) containing an email address. The recipients of the notification must have an email address entered in this attribute in order to receive the notification. This field is mandatory.
- Email addresses of other relevant individuals: free field in which you can add as many email addresses as you wish. Each recipient on the list will receive the notification without exception. This field is optional.
- Notification configuration
- Available language: select the language in which you want to write the notification. It is possible to send a notification in different languages by saving the subject and body for each language. The notification will be sent in the user's language as defined in their language attribute. If this is not defined, it will be sent in the default language.
- Subject: subject of the email. This field is optional but strongly recommended. This parameter can contain keywords. It can be written in any supported language.
- Truncate subject: parameter allowing you to limit the length of the subject by displaying the values of the keywords of the first target only if there are multiple targets. Select yes if you want to enable this option. No by default.
- Body: option to create a message in HTML mode.
- Email body: free field in which to write the notification text.
Keywords specific to the certification campaign:
The keyword #CERTIFICATIONCAMPAIGN# relating to a certification campaign can be used in notifications with different variations by using two parameters as follows:
1 | |
|
Primary parameter (PARAM_1) |
Secondary parameter (PARAM_2) |
Description |
|---|---|---|
| ATTRIBUTE | NAME | Allows to retrieve the name of the certification campaign. |
| STATUS | Allows to retrieve the status of the certification campaign. | |
| ID | Allows you to retrieve the certification campaign ID. |
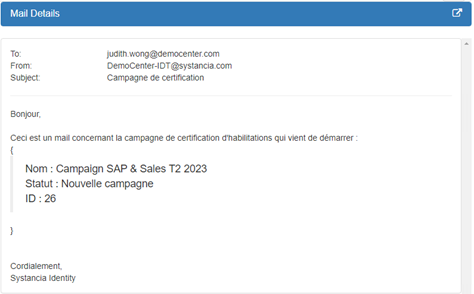
Notification example:
Email body configuration
1 2 3 4 5 6 7 8 9 | |
Email received (after keyword interpretation)
View accounts and authorizations for an identity¶
Accounts in the various application repositories are calculated based on defined management rules and the roles and authorizations assigned to identities.
The management rules for accounts are:
- Definition of an account status based on an identity status,
- Definition of account merging rules in the case of multiple identities,
- Definition of account creation rules based solely on role assignment.
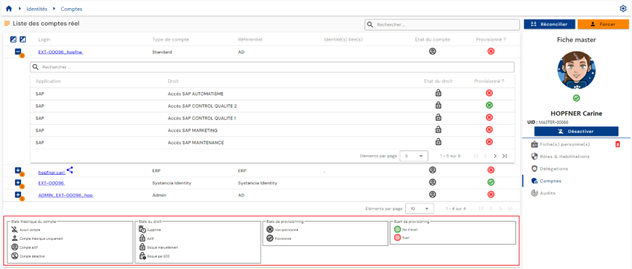
To view the accounts and authorizations linked to an identity, open the desired identity record in view mode and go to the “Accounts” tab.
This tab is only accessible in view mode and shows the results of account and authorization calculations made on the identity or all identities in the case of identity reconciliation. In the latter case, the tab is common to all identities in the reconciliation chain.
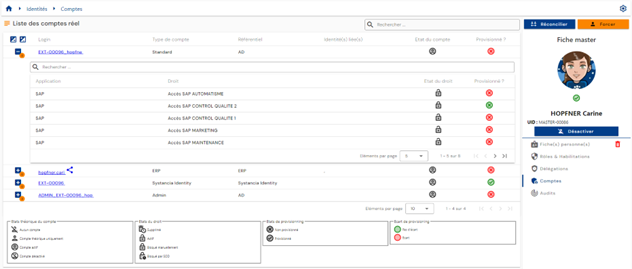
A table containing the calculated accounts is displayed. For each account, a nested table contains the authorizations linked to the account. An account can be generated without any associated authorizations.
In the event that several identities are reconciled and an account is common to several identities (account merge feature enabled), the account is identified by the “ ” icon.
Pagination is implemented to display only 10 accounts.
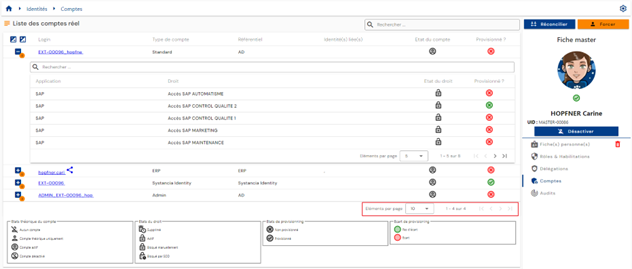
In the embedded table under an account, pagination is set up to display only 5 authorizations.
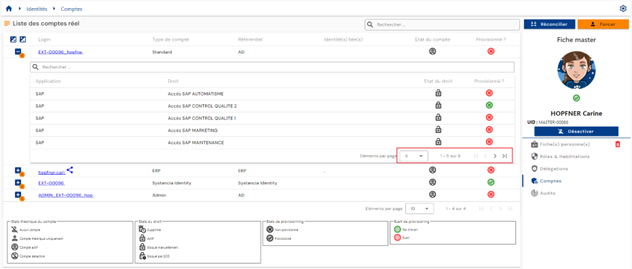
A search field is available at the top right of the account table. The search covers account logins or repository names.
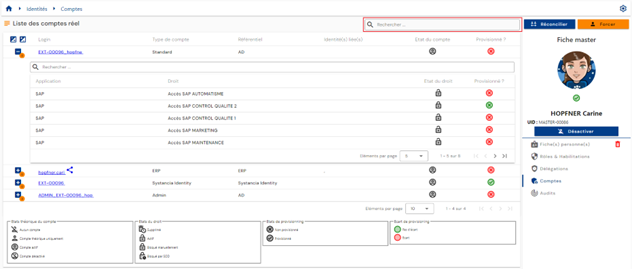
The theoretical status and provisioning status of accounts are visible on each line of the table.
In the table embedded under an account, a search field is available at the top of the authorizations table. The search covers the names of applications or authorizations.
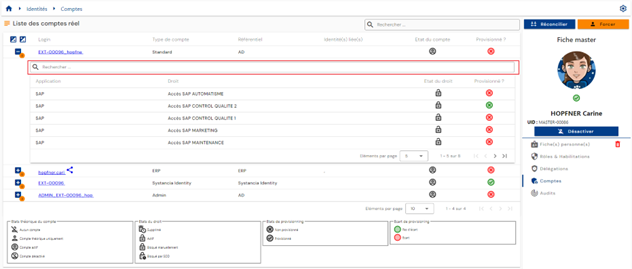
The theoretical status and provisioning status of authorizations are visible on each line of the table.
A legend explaining the different theoretical and provisioning statuses helps users understand the different statuses.
Provisioning/deprovisioning of accounts and authorizations¶
The process of transferring accounts and authorizations calculated by Systancia Identity to the various application repositories is referred to as downstream provisioning. Systancia Identity therefore has authority over the applications defined to manage accounts and authorizations.
There are two ways to manage provisioning:
- Either an automatic connector can be created (via API, database, directory, or automated flat file exchanges), in which case we refer to automatic provisioning.
- Or it is not possible to create an automatic connector, in which case we refer to semi-automatic provisioning.
Automatic provisioning/deprovisioning¶
To provision accounts and authorizations in application repositories, you need to use the Systancia Identity Provisioning (SIP) engine to create a downstream provisioning connector: from Systancia Identity, which is the authoritative source, taking into account the configured synchronization rules, accounts and authorizations will be created, updated, or deleted in the application repositories according to the rules defined in the import rules.
A downstream provisioning sequence must consist of at least the following elements:
- An export of the Identity repository (authoritative) of type “USER + ACCESS” or “ACCOUNT + ACCESS”
- An export of the target application repository
- A synchronization rule
- An import rule in the target application repository
Please refer to the “Automatic Provisioning Connector Management” page to create a connector.
Semi-automatic provisioning/deprovisioning¶
A semi-automatic provisioning connector is created using a “User request” or “Event” workflow with at least one manual provisioning or deprovisioning task.
In the manual provisioning task, the provisioning actions to be performed are listed in a notification sent to the operator. Once the operator has completed the task, they can click on the “Task validated” button to indicate that provisioning has been completed. The provisioning status of the account and/or authorizations is updated in Systancia Identity. This allows administrators to check the status of identity rights.