Management of object types
The different object types in the solution enable you to set up the configuration for managing identities and their authorizations.
There are four types of objects:
- Identity: a person's digital identity
- Structure: an organizational or hierarchical structure. It is linked to identities or allocations.
- Allocation: enables you to manage material resources. Attached to identities or structures
- Account: target application accounts are calculated based on the roles and authorizations linked to identities.
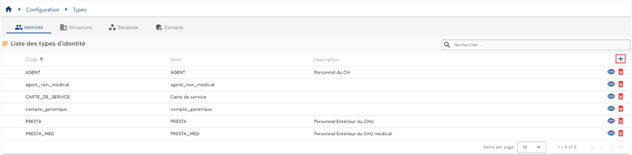
Create/modify/delete an identity type or allocation type
There are two ways to access identity or allocation type management:
- The first is from the “Identities” or “Allocations” menus. Click on the “
 ” icon located to the right of the horizontal banner.

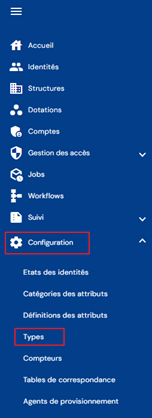
- The second way is from the “Configuration/Types” menu.
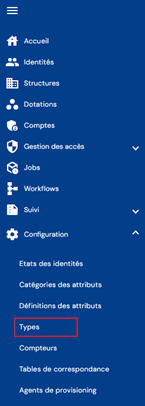
Then click on the tab for the desired object.
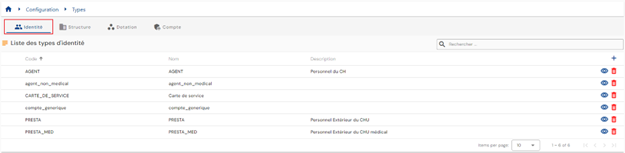
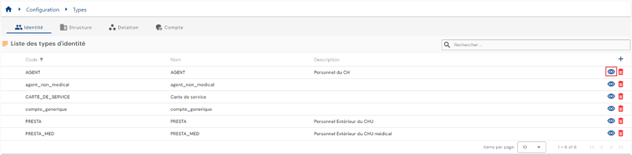
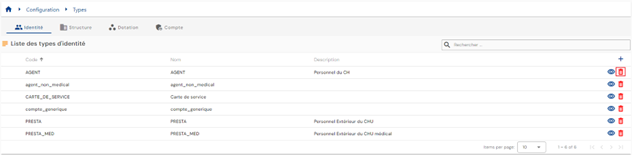
For “Identity” or “Allocation” objects, you will be taken directly to the list of existing object types, preloaded in a table without any filters applied but respecting the permissions associated with the profile of the person logged in.
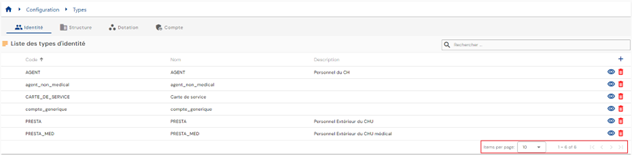
Pagination is implemented to display only 10 object types.
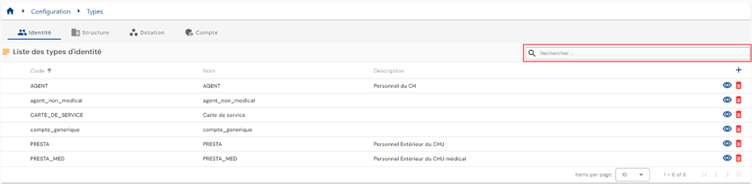
A search field is available at the top right of the table. The search covers the codes, names, or descriptions of object types, i.e., the fields displayed in the table.
To create a new identity or allocation type, click on the “ ” button.
First, enter the general parameters for an identity or allocation type:
- Icon: Icon displayed in object viewing records. Optional.
- Color code: distinctive color to define the type of object. Default #000000, i.e., black.
- Code: code for the type of object. Must be unique, without spaces or special characters. Mandatory.
- Name: name of the object type. Label that will be displayed in the various forms of the application. Mandatory.
- Description: field for entering a description of the object type. Optional.
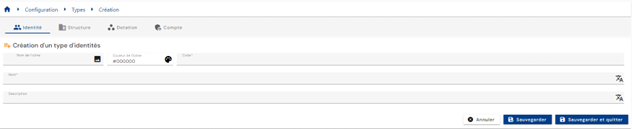
Validate the creation form to add categories and attributes.
To view and modify an “Identity” or “Allocation” object type, click on the icon “ ” located to the right in the corresponding table row.
It is possible to switch to edit mode directly from the object type viewing page.
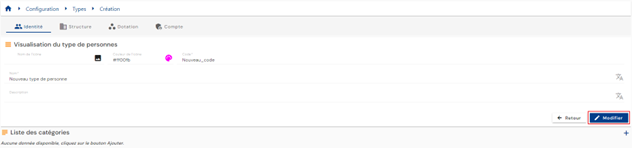
In edit mode, all fields can be modified.
Actions on buttons in edit or create mode:
- Cancel: cancels the current entry and returns to the list of person types page.
- Save: Validates the form and switches the page to view mode.
- Save and quit: Validate the form and return to the list of person types page.
To delete an object type of the “Identity” or “Allocation” type, click on the “ ” icon located to the right in the corresponding table row.
A confirmation message will appear before the object type is deleted.
Warning: it is not possible to delete an object type as long as related data exists.
Create/modify/delete a structure type in an organizational tree
There are two ways to access structure type management:
- The first is from the “Structures” menu. Click on the “
 ” icon located to the right of the horizontal banner.

- The second way is from the “Configuration/Types” menu.
Then click on the “Structure” tab.

You will be taken directly to the list of organizational trees with a visual representation of their tree structure.
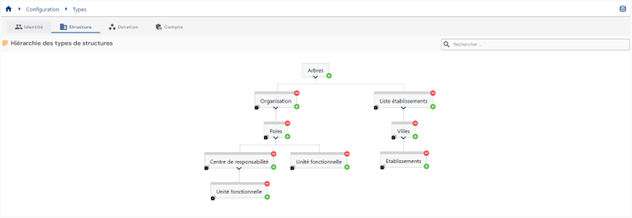
To create a new organizational tree, click on the icon “ ” located to the right of the “Trees” field. A tree is a type of structure without an associated parent.

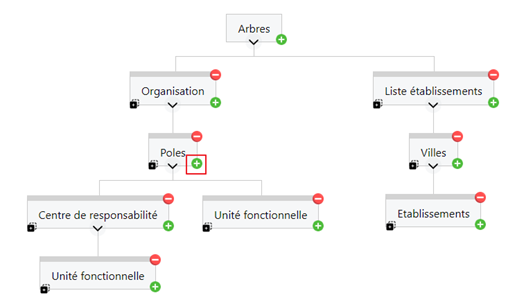
To create a new type of structure in an organizational tree, click on the “” button to the right of the parent structure to which you want to add a sub-level. For example, to add a sublevel to the “Poles” structure, click on the “” button in the “Poles” structure.
First, enter the general parameters for a structure type:
- Icon: image that can be chosen from a list. Will be integrated into the structure consultation page. Optional.
- Color code: distinctive color to define the type of structure. Will be integrated into the structure consultation page. Default #000000, i.e., black.
- Code: structure type code. Must be unique, without spaces or special characters. Mandatory.
- Name: name of the structure type. Label that will be displayed in the various forms of the application. Mandatory.
- Description: field for entering a description of the type of structure. Optional.
- Possible parents: leave the field blank to create a new organizational tree. For tree structures, the field is pre-filled with the parent from which a structure subtype was added. It is possible to add other parents.
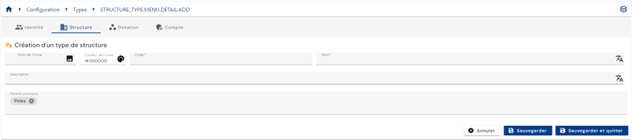
Validate the creation form to add categories and attributes.
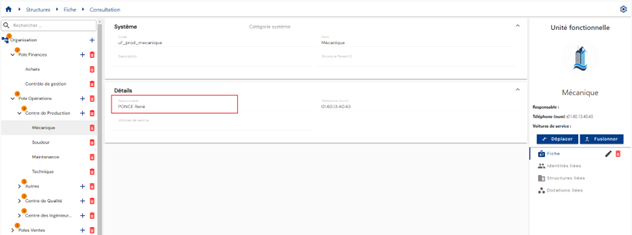
To view and modify a structure type, click on the desired structure type.

You can switch to edit mode directly from the structure type view page.
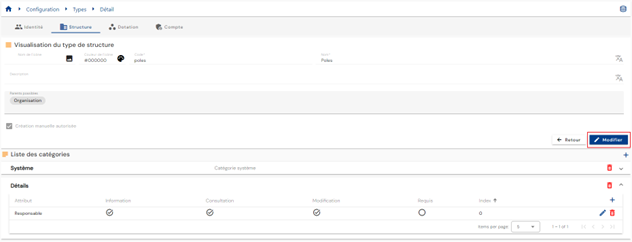
In edit mode, all fields can be modified except for the structure type code.
Actions on buttons in edit mode or when creating a structure type:
- Cancel: cancels the current entry and returns to the organizational tree list page.
- Save: Validates the form and switches the page to view mode.
- Save and quit: Validate the form and return to the organizational tree list page.
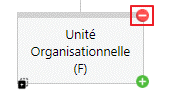
To duplicate a structure type, click on the icon “ ” located at the bottom left of the desired structure type.

A new structure is created and the following information is duplicated:
- Parent structure
- Related categories and attributes
Actions on buttons in edit, duplicate, or create structure type mode:
- Cancel: cancels the current entry and returns to the list of person types page.
- Save: Validates the form and switches the page to view mode.
- Save and quit: Validate the form and return to the list of person types page.
To duplicate a structure type, click on the icon “ ” located at the top right of the structure type.
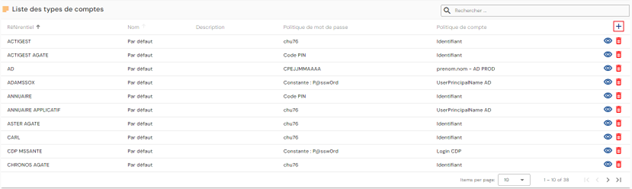
Create/modify/delete an account type for a repository
There are two ways to access account type management:
- The first is from the repository consultation page. Go to the “Account types” tab.
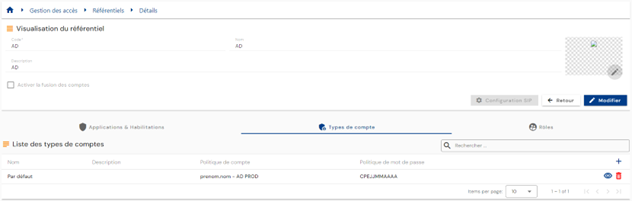
You will be taken directly to the list of existing account types, preloaded in a table and filtered according to the repository currently being viewed and in accordance with the permissions associated with the profile of the person connected.
- The second way is from the “Configuration/Types” menu.
Then click on the “Accounts” tab.

You are taken directly to the list of existing account types, preloaded in a table with no filters applied but respecting the permissions associated with the connected user's profile.
Pagination is implemented to display only 10 account types.

A search field is available at the top right of the table. The search is based on the name of the account types.

To create a new account type, click on the “” button.
First, enter the general parameters for a person type:
- Repository: select a repository from the drop-down list. This field is pre-filled and cannot be modified if accessed from the repository page.
- Code: account type code. Must be unique, without spaces or special characters. Mandatory.
- Name: name of the account type. Label that will be displayed in the various forms of the application. Mandatory.
- Description: field for entering a description of the account type. Optional.
- Account policy: Select an account policy from the choices in the drop-down list. Mandatory.
- Password policy: Select a password policy from the choices in the drop-down list. Optional.
- Account generation: option allowing an account to be generated when an identity has the role defined by the rule.
- If checked, an identity with a role but no rights may have an account generated (if the person's status complies with the rules for assigning an account).
- If unchecked, an identity with a role but no rights will not have an account generated.
Validate the creation form to add categories and attributes to the account type and to define account statuses based on identity statuses.
To define account statuses based on identity statuses, in the “Identity statuses” tab, click on the “” icon.

Specify the desired identity status and select the account status from the drop-down list.
The possible account statuses are:
- No account (-1)
- Theoretical account (0)
- Active account (1)
- Disabled account (2)
To view and modify an account type, click on the icon “” located to the right in the corresponding table row.
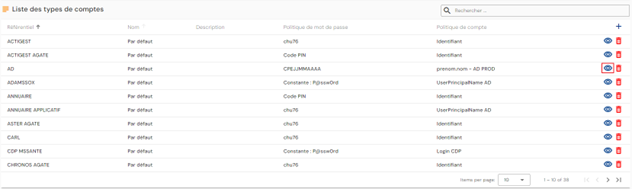
You can switch to edit mode directly from the account type viewing page.
In edit mode, all fields can be modified.
Actions on buttons in edit or create mode:
- Cancel: cancels the current entry and switches the page to view mode.
- Save: Validates the form and switches the page to view mode.
- Save and quit: Validate the form and return to the list of person types page.
To delete an account type, click on the icon “” located to the right in the corresponding table row.
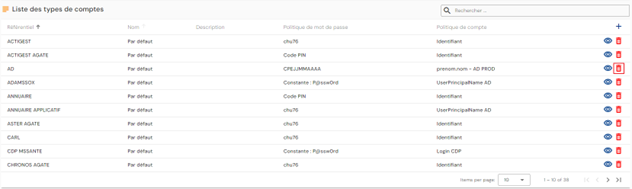
A confirmation message will appear before the account type is deleted.
Warning: it is not possible to delete an account type as long as related objects exist.
Define the object types that can be created via the interface
To enable the creation of an object type via the interface, the following conditions must be met:
- Check the box that allows the creation of an object type via the interface. This checkbox is available on the configuration page for an object type.

- You must have permission in the Identity repository to create an object type.
Configure the forms for viewing/creating/modifying an object according to its type.
Configuring the forms for viewing, creating, or modifying an object means determining which attributes you want to display and/or modify.
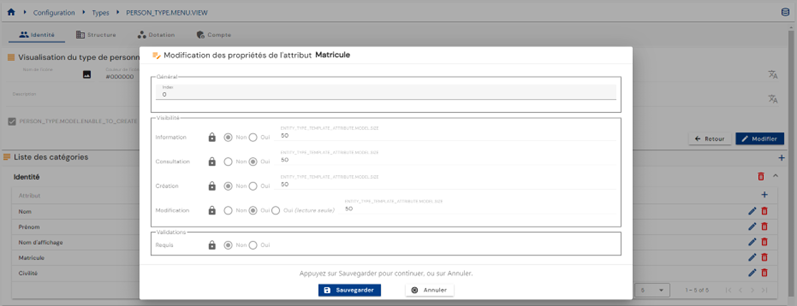
A default configuration for the attribute display mode can be set in the attribute configuration. To do this, go to the attribute configuration page and expand the “Display” section.
The display mode must be configured for the three different forms (view, create, and modify) as well as for the insert at the top right of the objects.
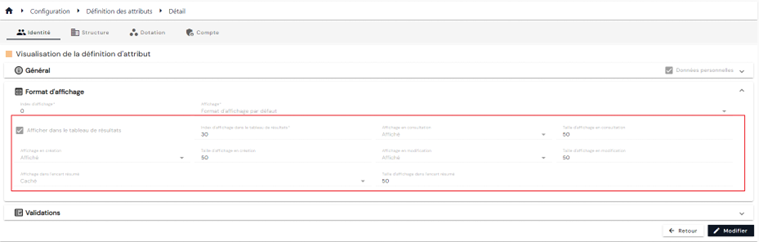
The possible values per form are as follows:
| Displayed | Hidden | Read-only | |
|---|---|---|---|
| Creation form | X | X | |
| Modification form | X | X | X |
| Consultation forms | X | X | |
| Summary insert | X | X |
It is also possible to override the default display mode for attributes in each object type. To do this, go to the object type configuration page, open the object type in view mode, and then edit the attribute to be overridden by clicking on the icon “ ” to the right of the attribute.
Select the display modes in the “Visibility” section:
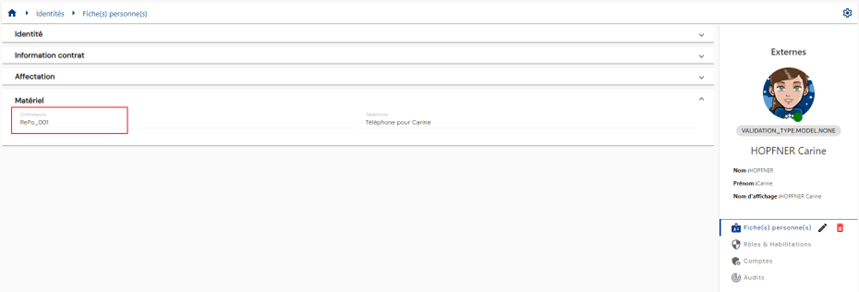
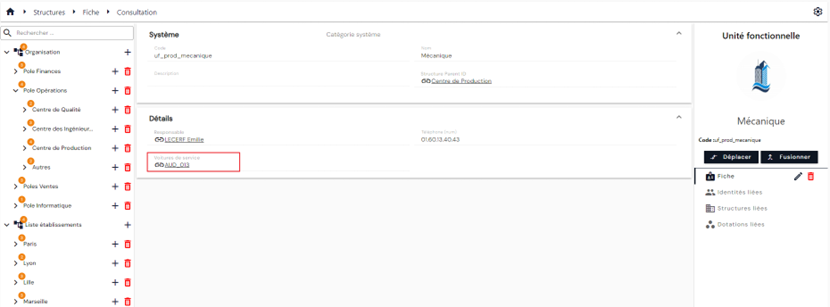
Create a link between an identity and a structure
There are two ways to create a link between an identity and a structure. Either a structure is attached to an identity, or vice versa, an identity is linked to a structure.
To link a structure to an identity, you must configure a structure-type attribute and link it to a person type.
This way, from the person file, you can see the structure to which the person is linked.
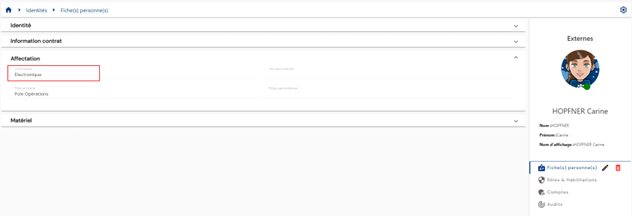
This information is also available by consulting the structure file, which displays the list of linked persons.
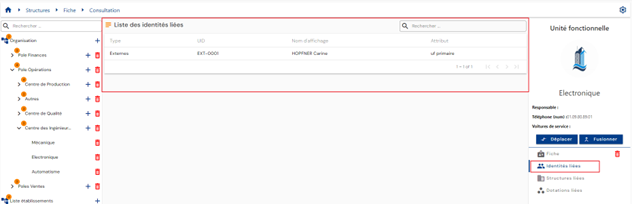
To link an identity to a structure, you must configure a person type attribute and link it to a structure type.
This way, from the structure record, you can see the identity to which the structure is linked.
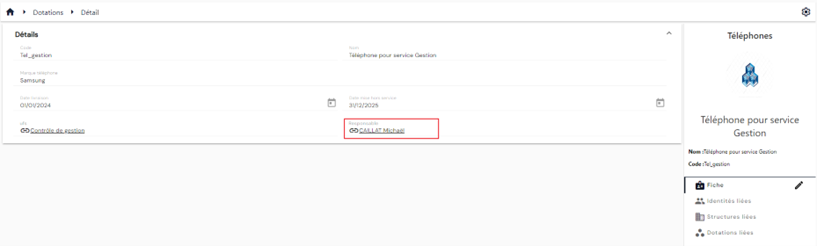
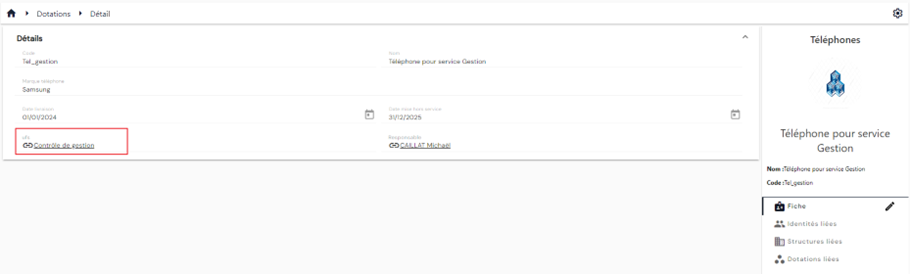
Creating a link between an identity and an allocation
There are two ways to create a link between an identity and an allocation. Either an allocation is attached to an identity, or vice versa, an identity is linked to an endowment.
To link an endowment to an identity, you must configure an allocation-type attribute and link it to a person type.
This way, from the person file, it will be possible to see the allocation to which the person is linked.
This information will also be available by consulting the allocation record, which will display the list of linked persons.
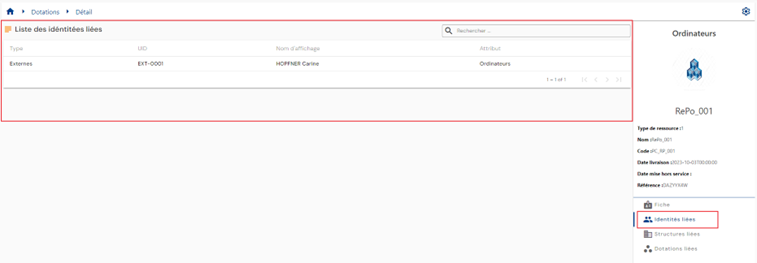
To link an identity to an allocation, you must configure an identity-type attribute and link it to an allocation type.
This means that from the allocation record, it will be possible to see the identity or identities linked to the allocation.
Creating a link between an allocation and a structure
There are two ways to create a link between an allocation and a structure. Either a structure is attached to an allocation, or vice versa, an allocation is linked to a structure.
To link a structure to an allocation, you must configure a structure-type attribute and link it to an allocation type.
This way, from the allocation record, you can see the structure to which the allocation is linked.
This information is also available by consulting the structure record, which displays the list of linked allocations.
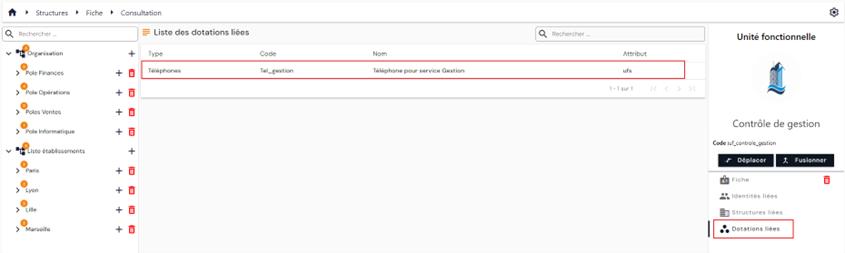
To link an allocation to a structure, you must configure an allocation-type attribute and link it to a structure type.
This means that from the structure record, it will be possible to see the allocation to which the structure is linked.
Creating a link between two identities
Creating a link between two identities involves configuring an identity attribute and linking it to a person type.
This means that from the person record, it will be possible to see the identity to which the person is linked.
