Microsoft Entra ID
This article describes how to configure SAMLv2 identity federation between Microsoft Entra ID and cyberelements.io.
Warning!
The information provided below is only valid for cyberelements.io.
Configuring a SAML identity provider with Microsoft Entra ID
Sign in to the Azure admin console: Azure admin console
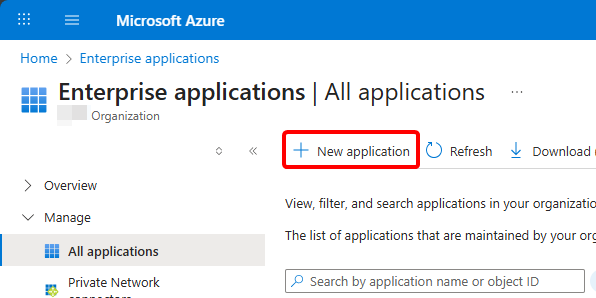
Once logged in, go to your Enterprise applications.
From there, create a new one:
Select to create your new application:
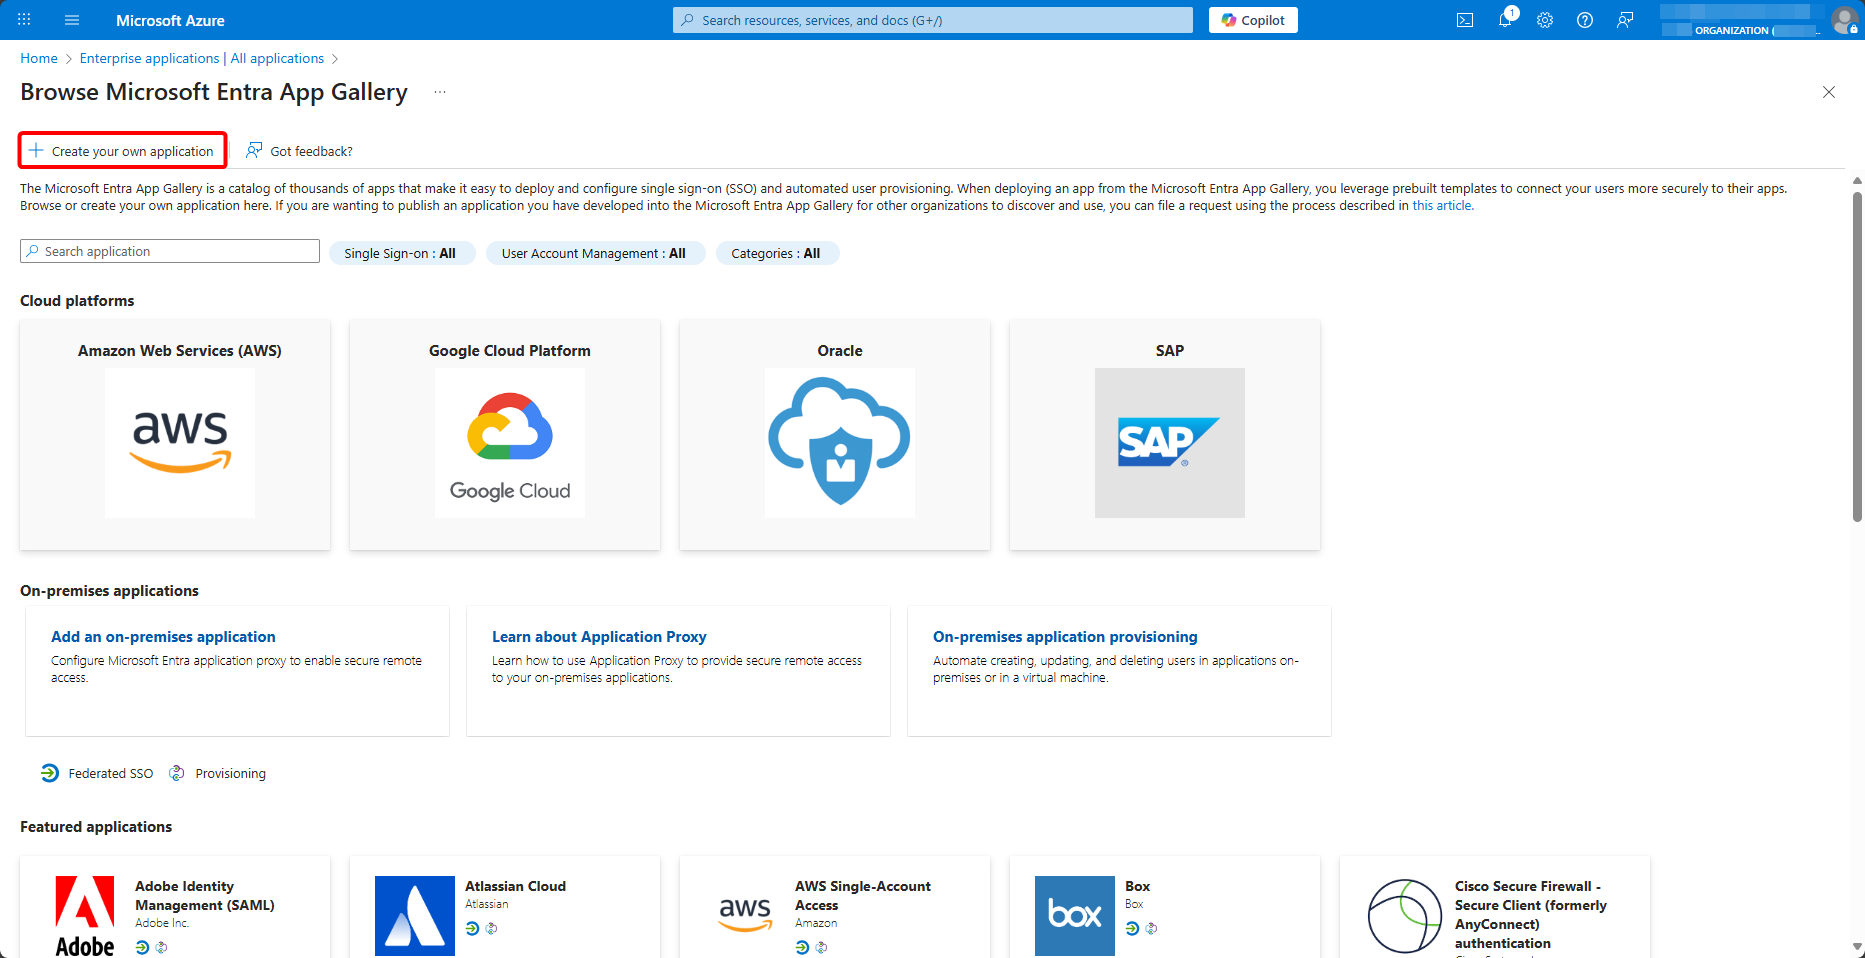
Name it, select to integrate another application not found in the gallery, and create it:
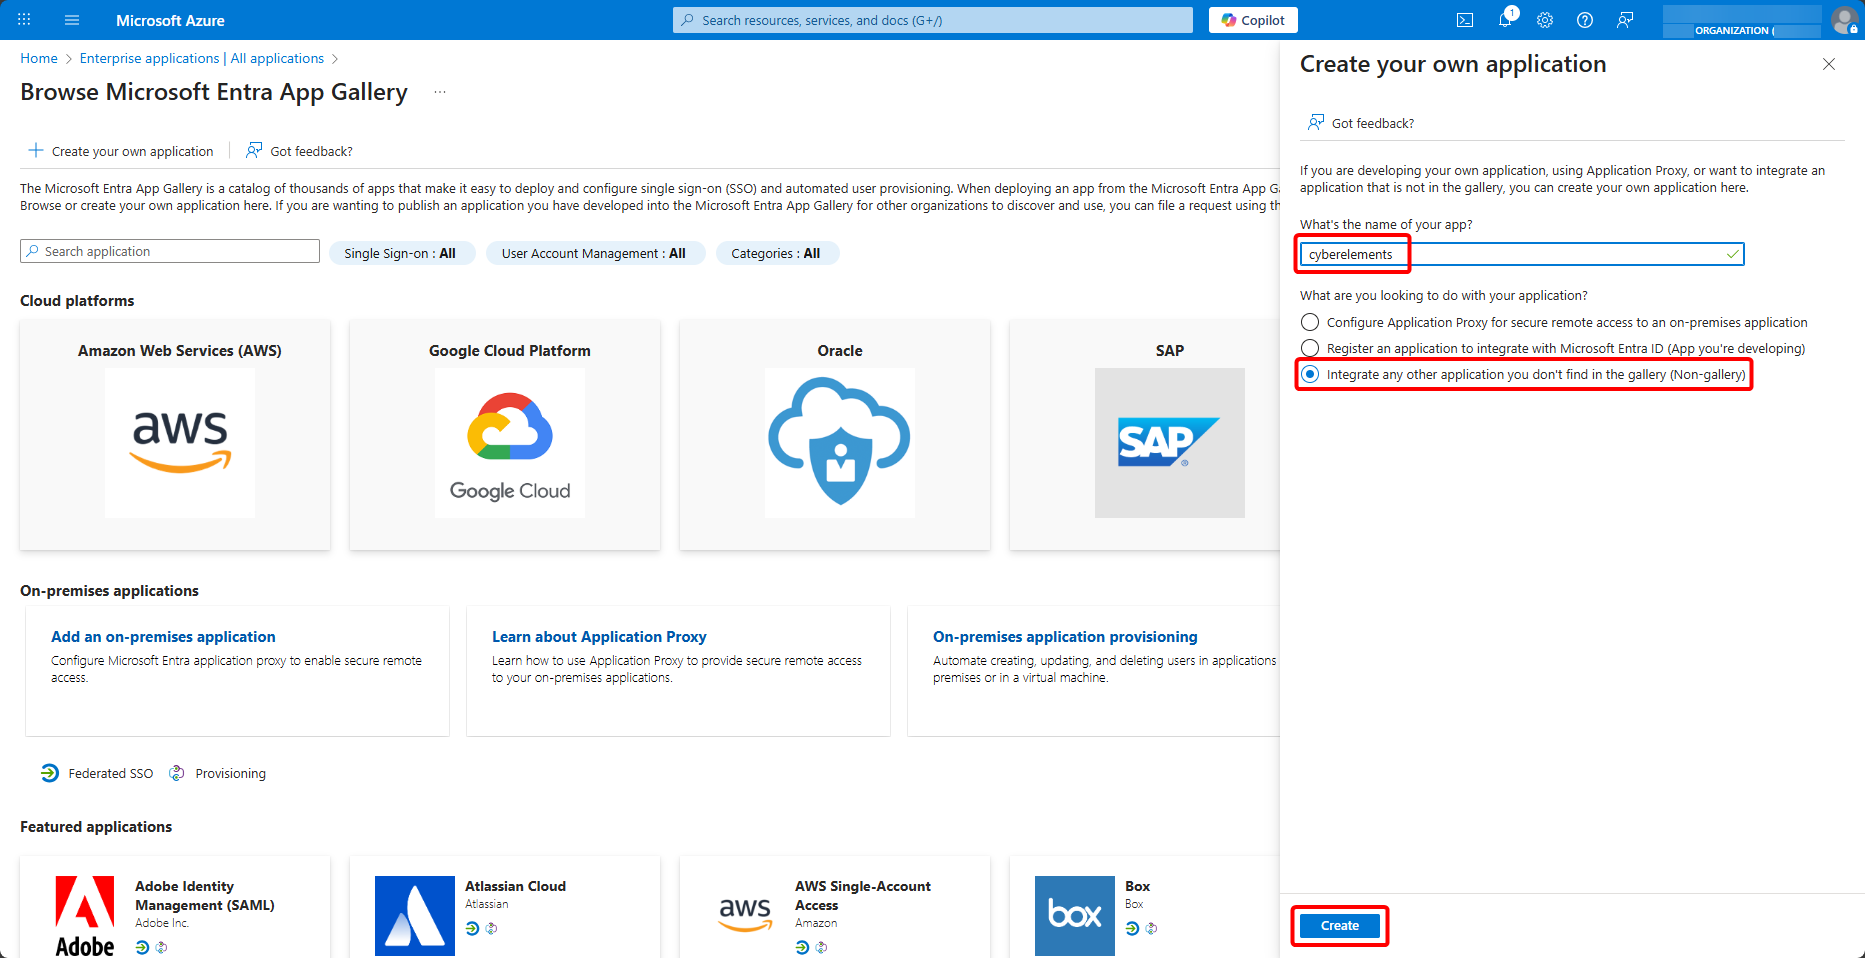
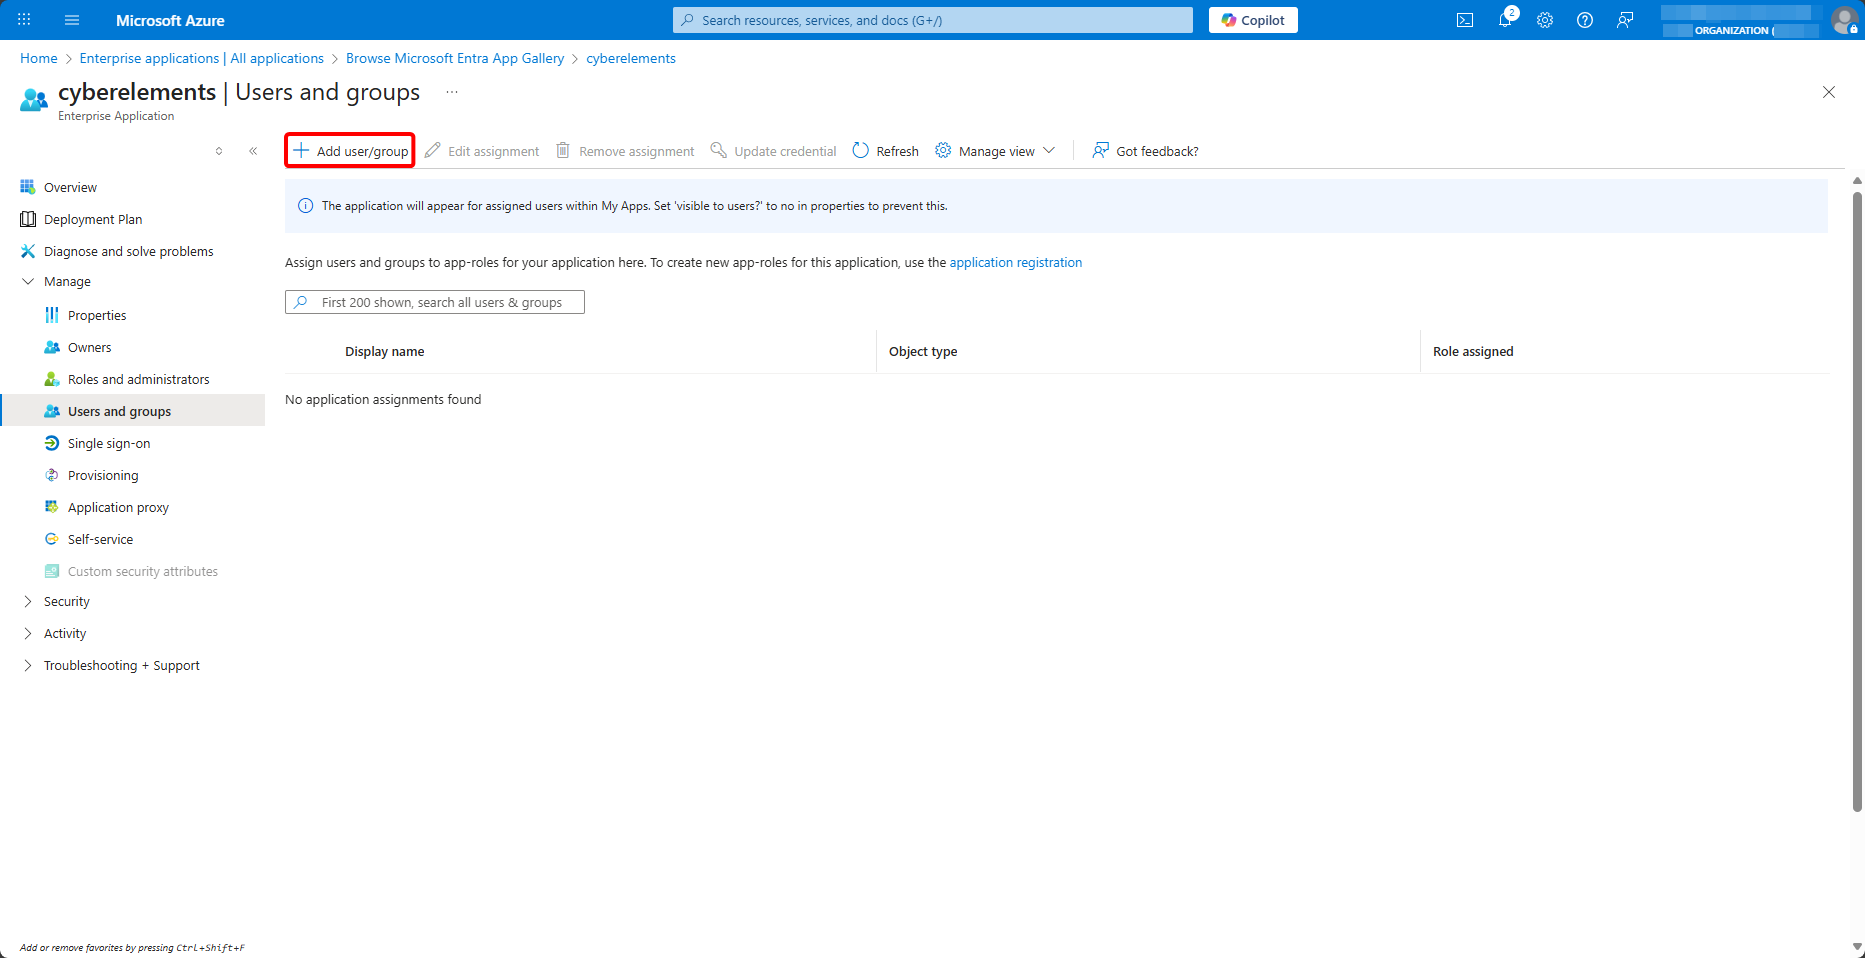
Once your enterprise application has been created for cyberelements.io, add users and user groups to it:
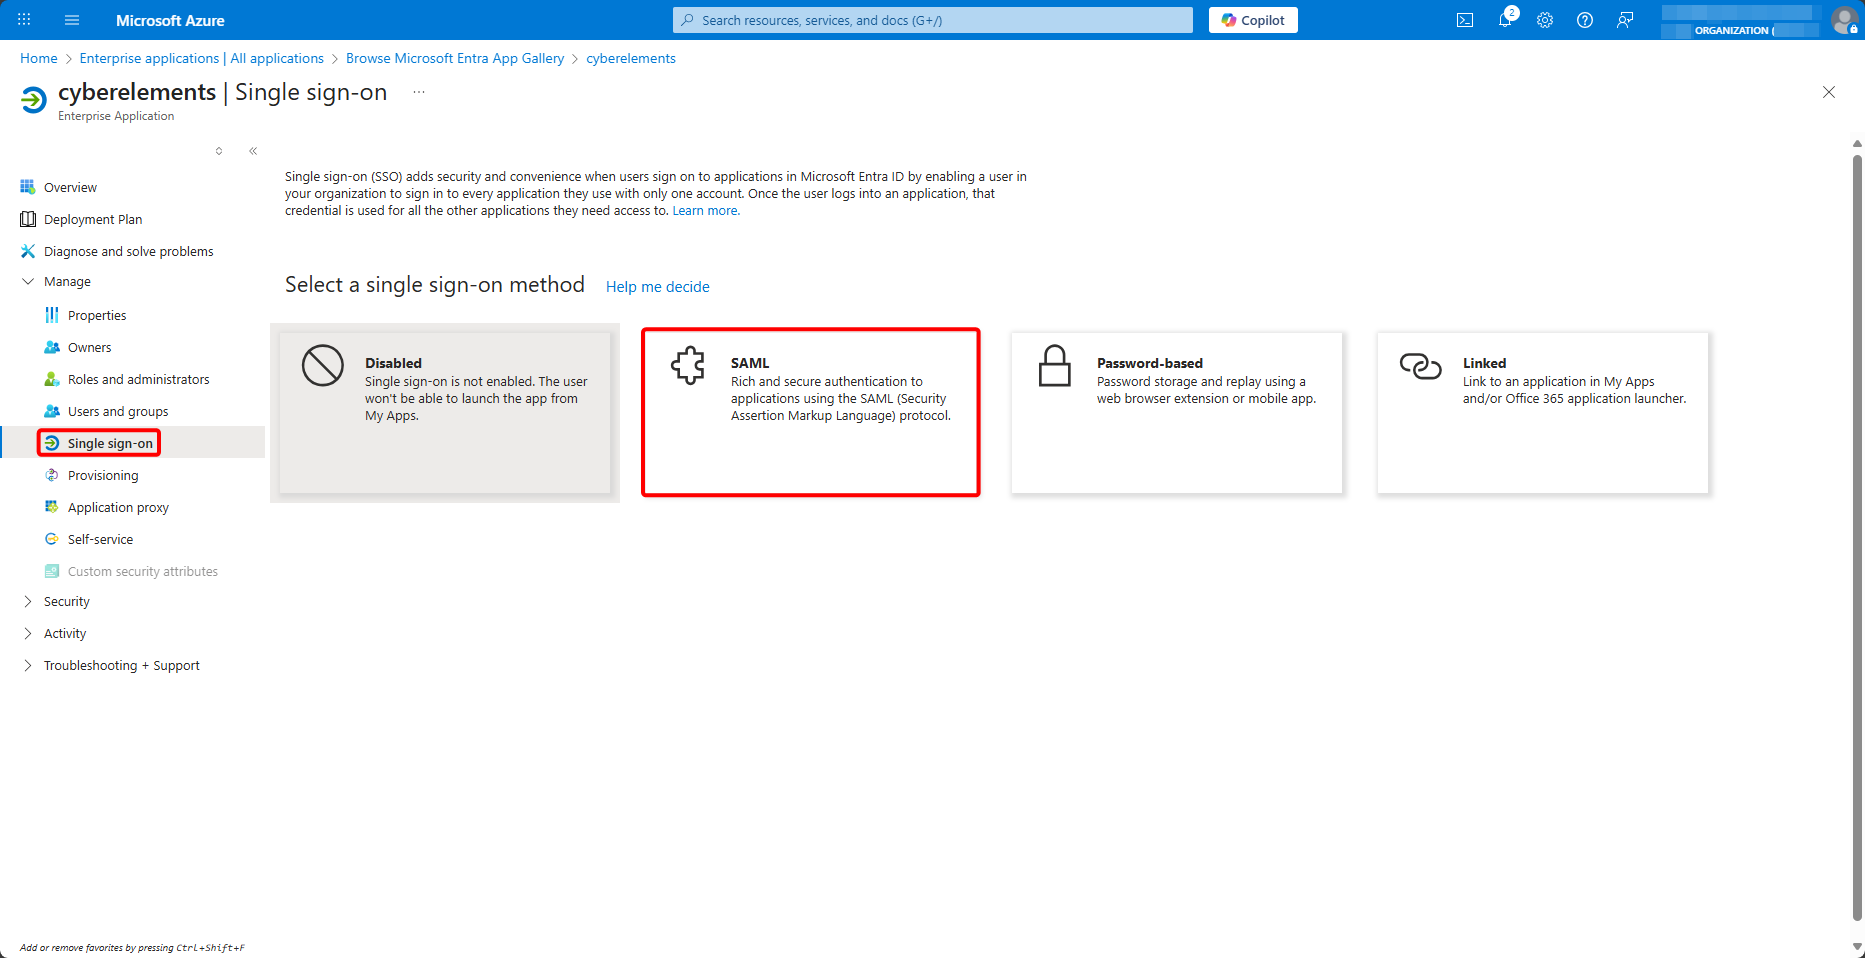
Next, go to the Single sign-on menu to begin SAML configuration by selecting it:
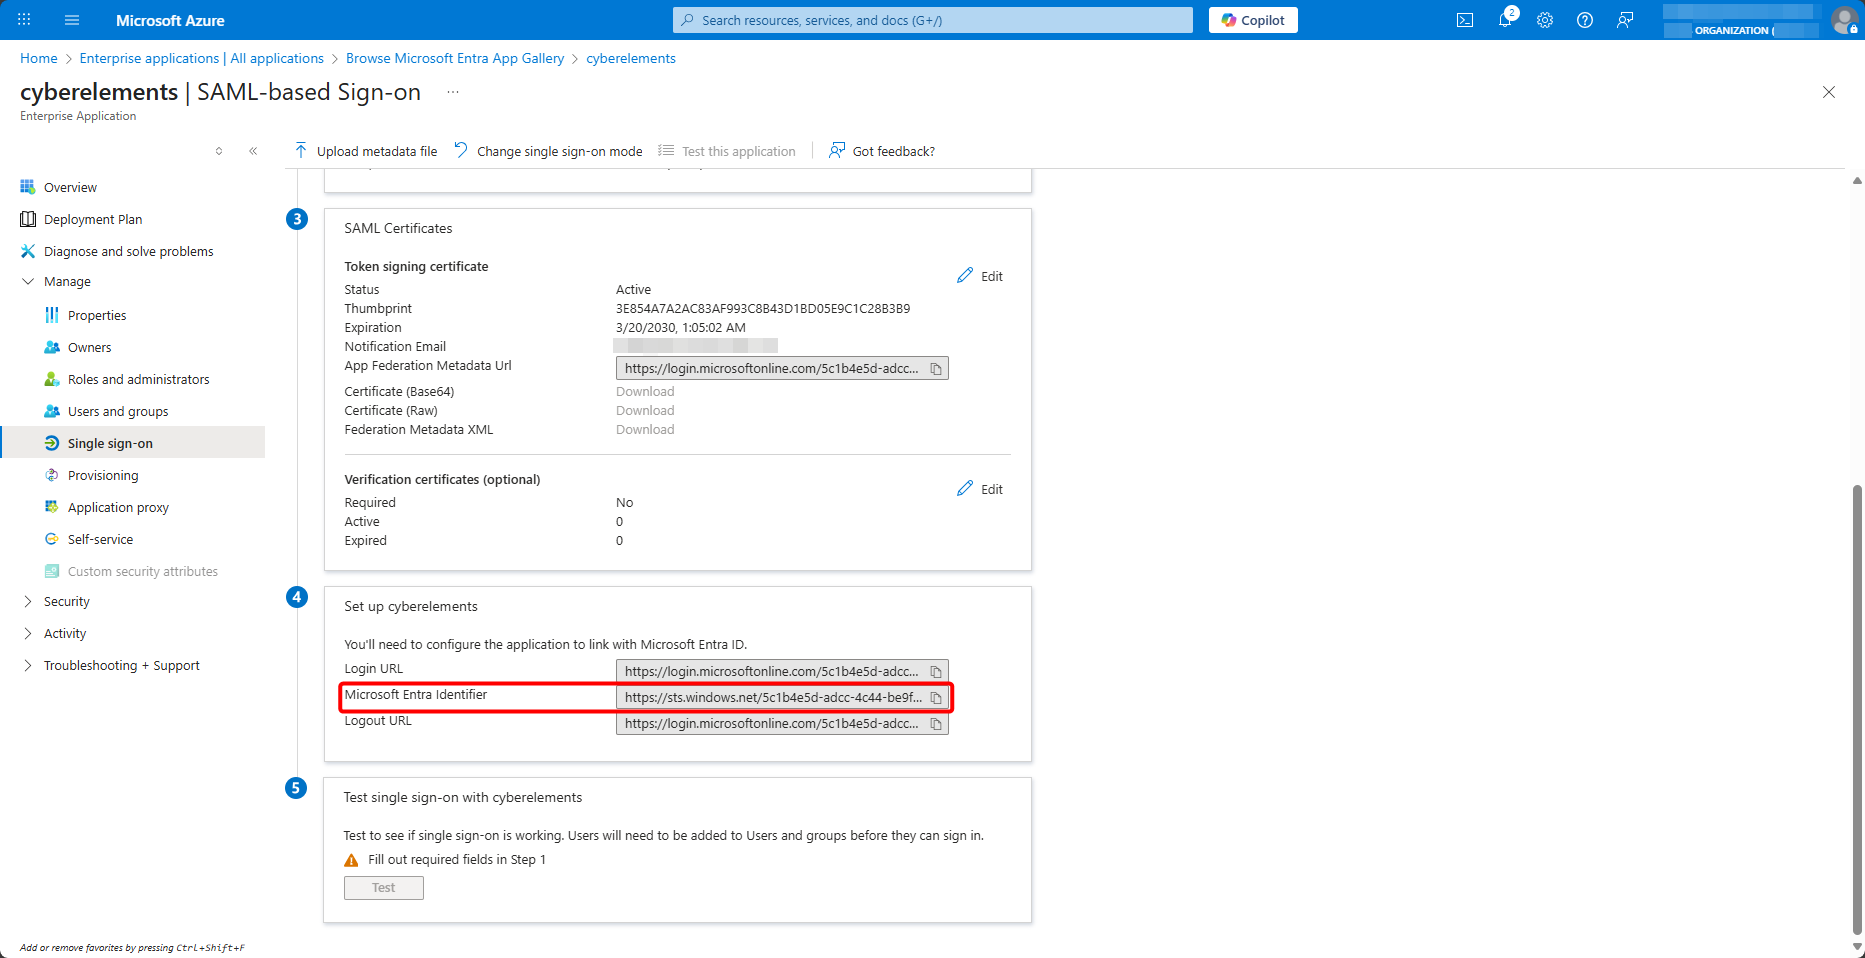
At the bottom of the page, copy the value of Microsoft Entra Identifier:
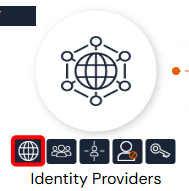
Keep the tab open and, from the cyberelements.io administration console, open the identity providers:
Then add a new one:

- Select the SAML domain type
- Name your new domain
- Add an optional description
- Specify your local domain; this will be used for the SSO mechanism when it is enabled
- Adjust the expiration time for inactive user sessions (user sessions where no cyberelements.io application is running)
- Adjust the number of simultaneous sessions allowed for each user
- Enable or disable automatic deletion of the oldest session if the user logs in when they have already reached the maximum number of simultaneous sessions
- Select the
Azureidentity provider - Enter the
Microsoft Entra Identifiervalue retrieved previously - Enter the value of the following group variable:
1http://schemas.microsoft.com/ws/2005/05/identity/claims/groups - Leave the group variable format as
URI - Enter the value of the following login variable:
1http://schemas.microsoft.com/ws/2005/05/identity/claims/name - Leave the login variable format as
URI - Add or do not add the domain in cascade authentication
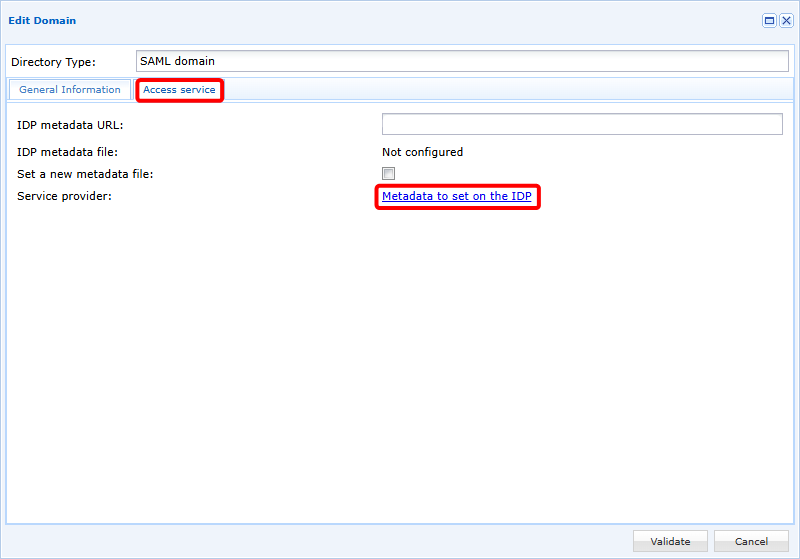
Confirm the creation of the domain, then reopen it to go to the second tab.
From there, you can download the configuration metadata for the IDP:
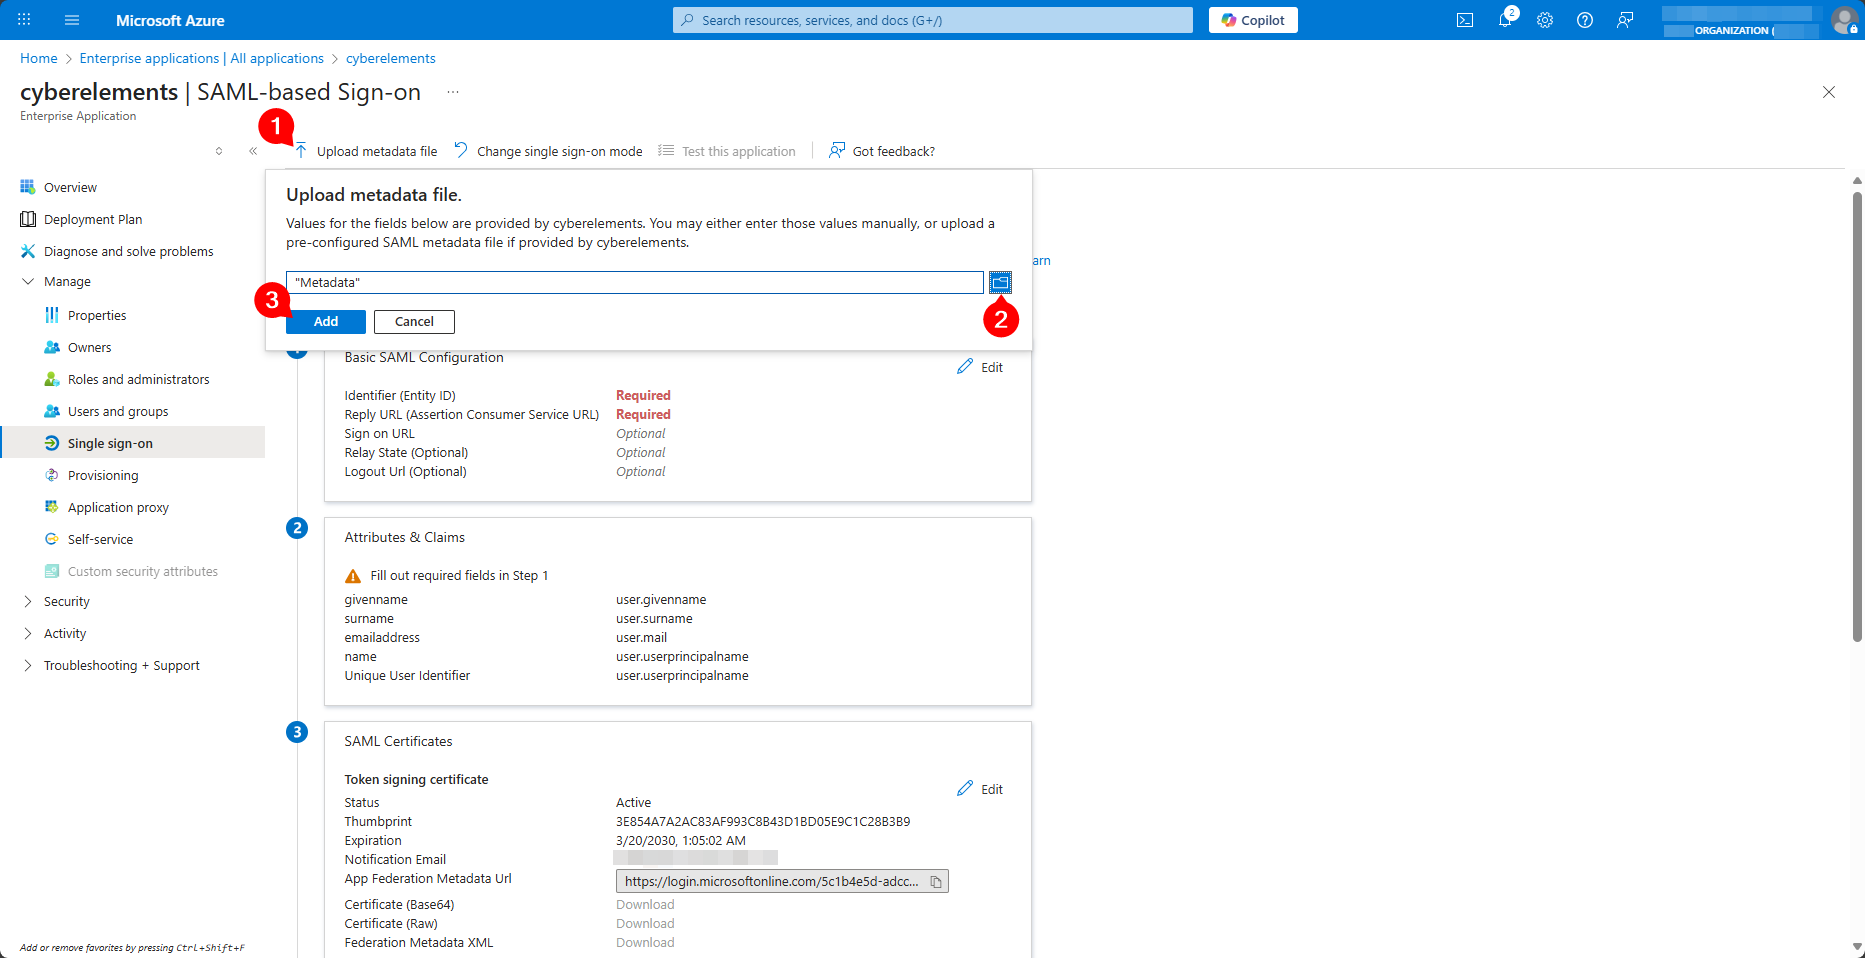
Return to the Entra ID enterprise application configuration tab and upload the Metadata file retrieved from cyberelements.io:
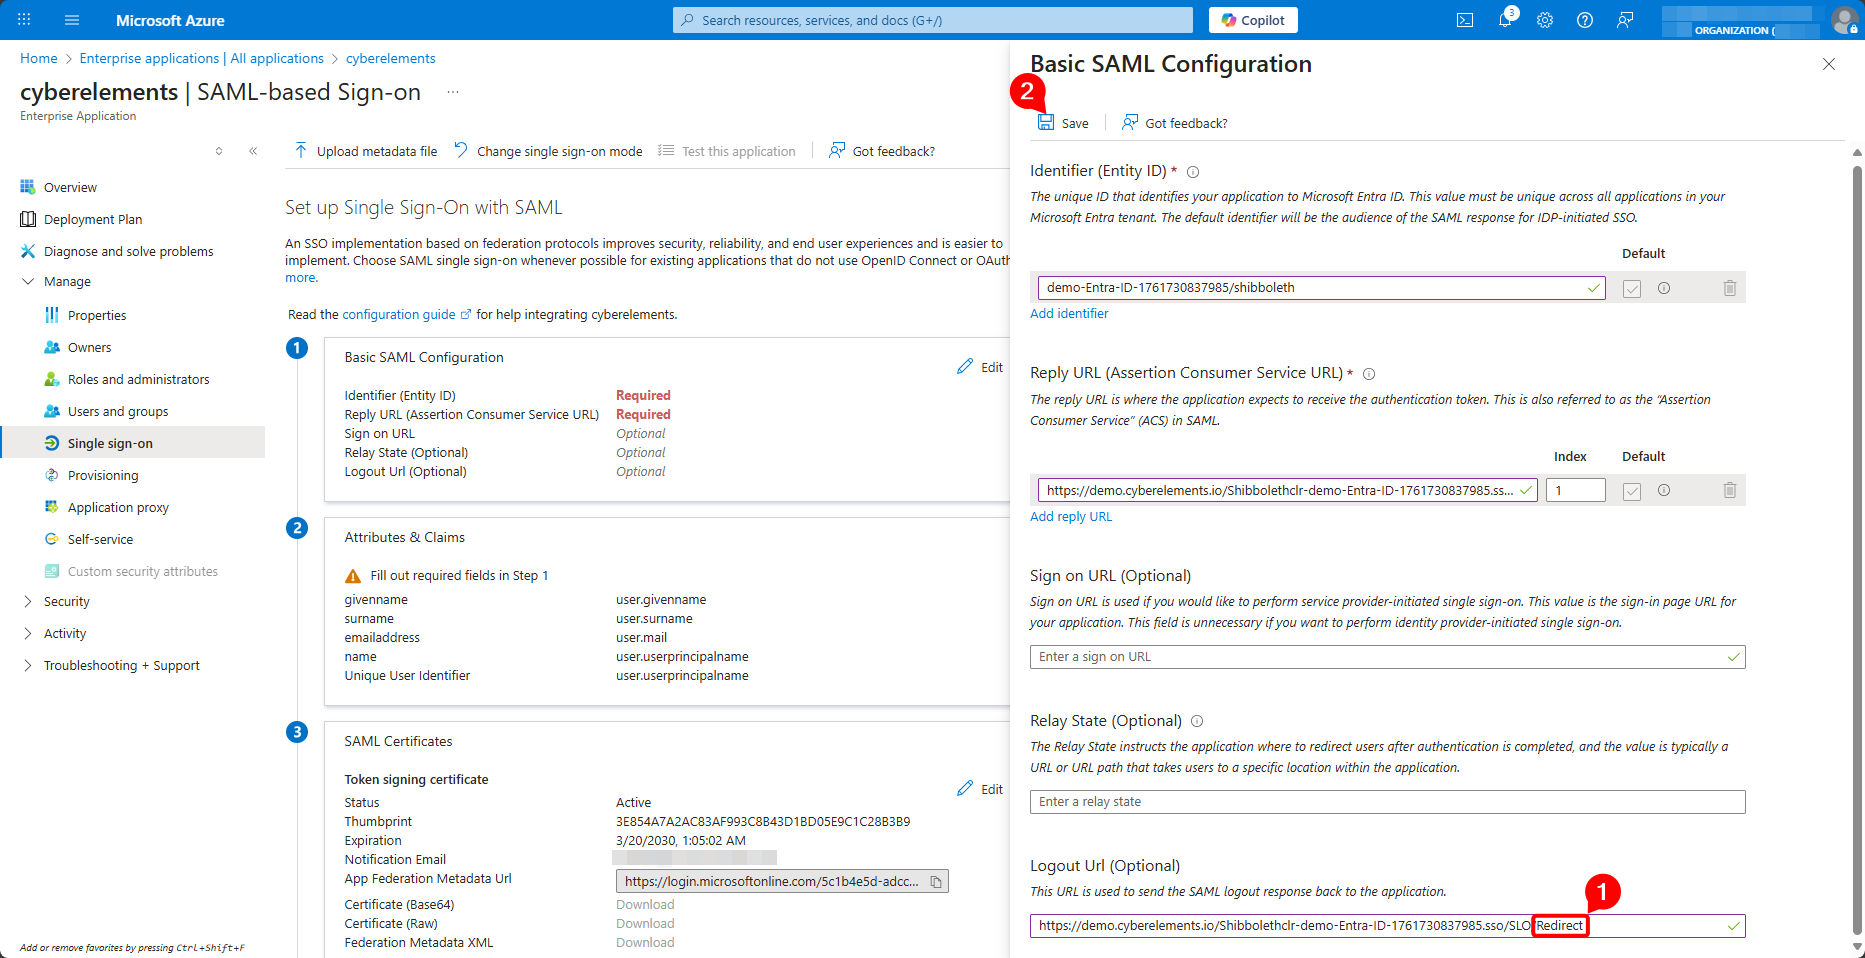
Change the value of the logout URL by replacing the end /Artifact with /Redirect and save the configuration:
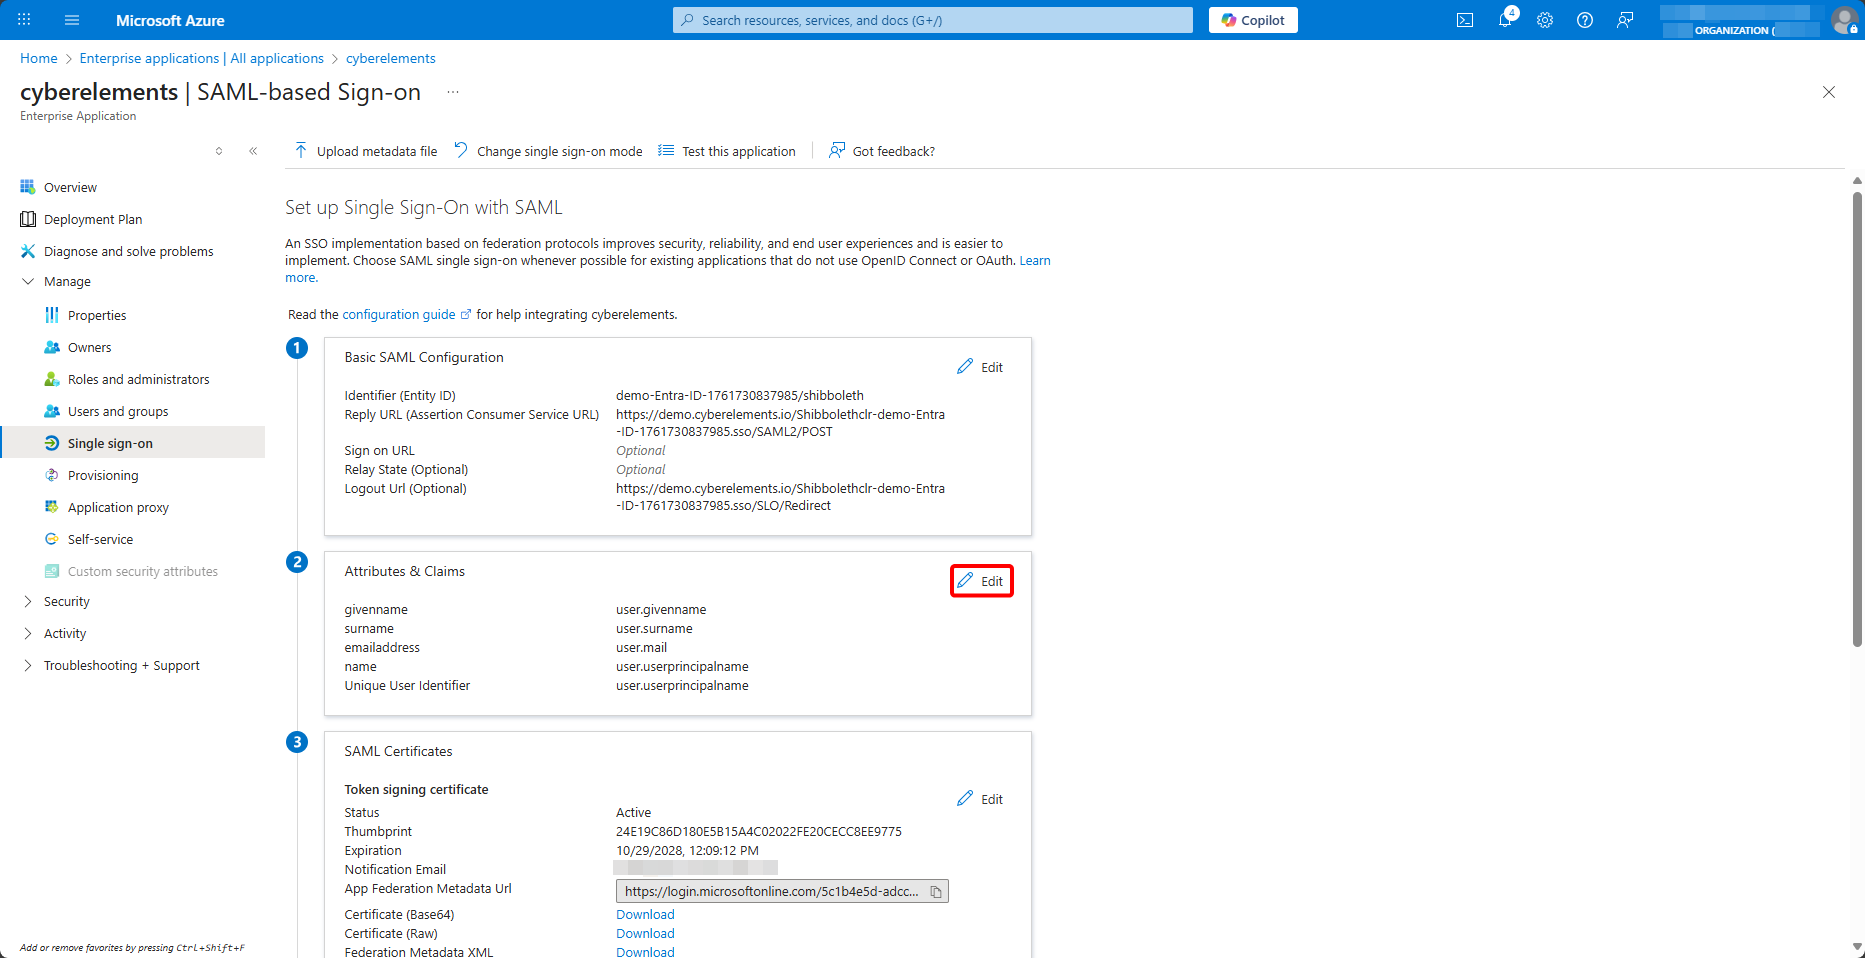
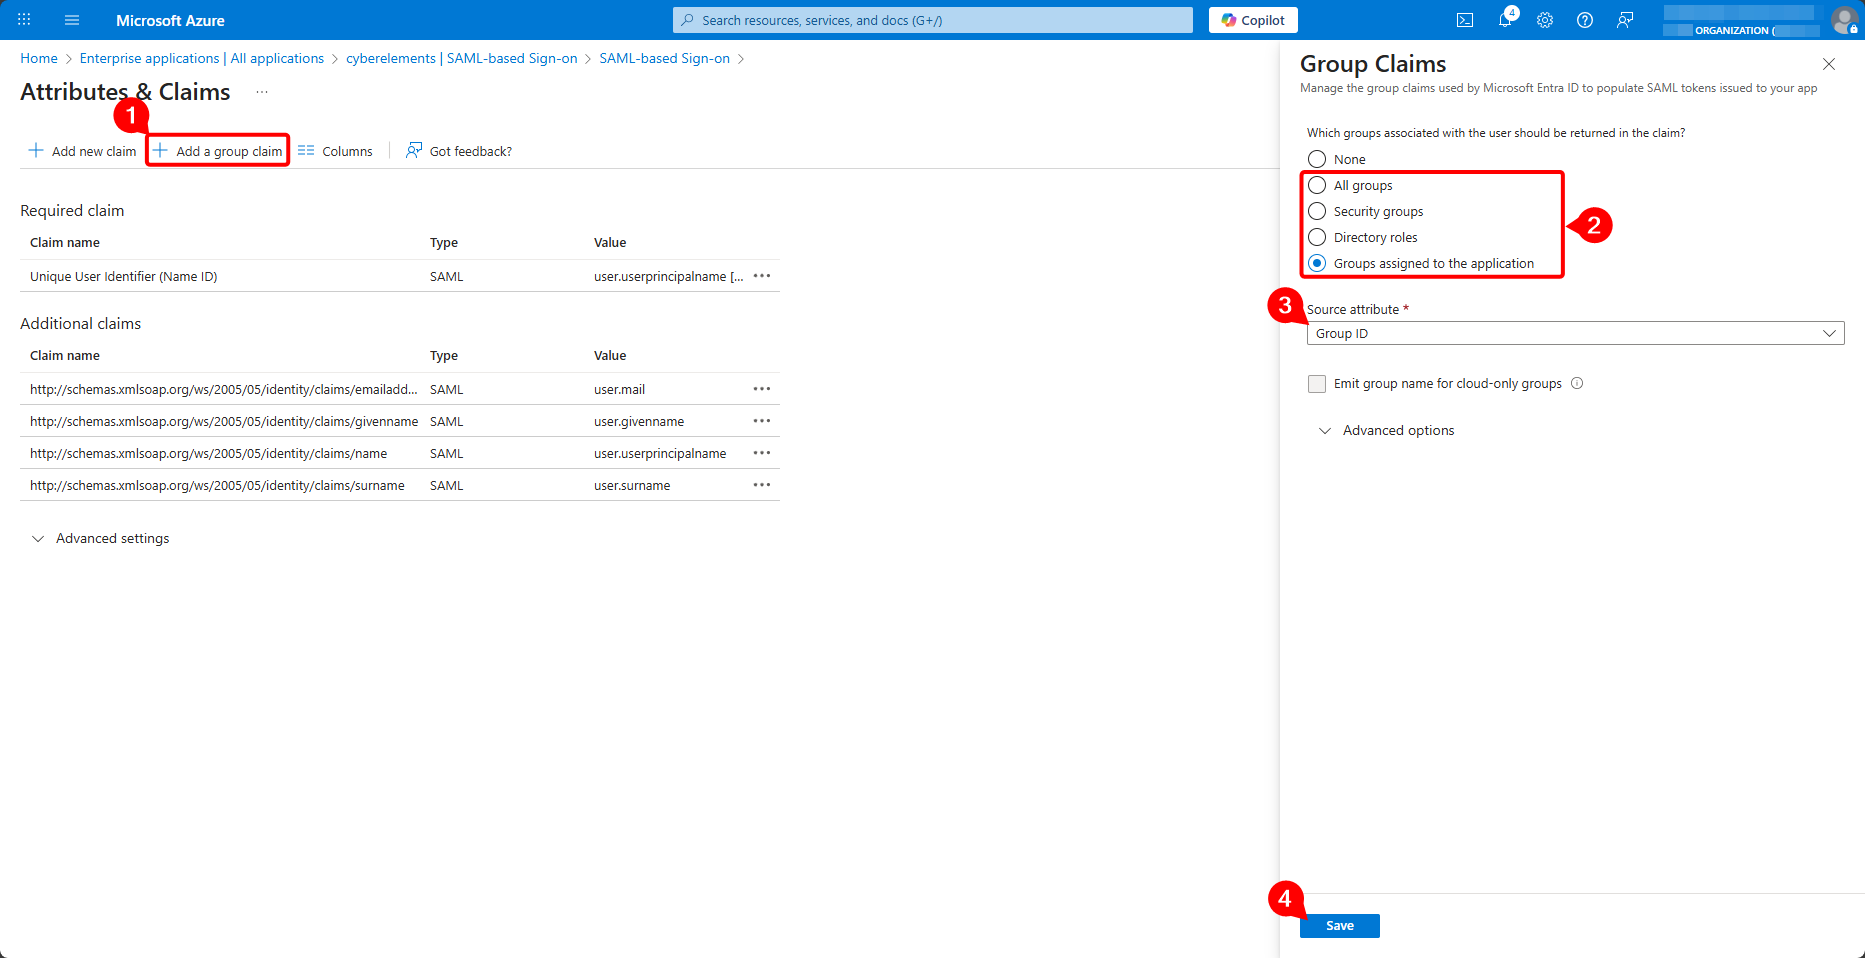
Then edit the SAML attributes and assertions:
Add a new group assertion, upload either all of the user's groups or only the groups assigned to the enterprise application, make sure that it is the group ID that is uploaded, and validate the creation of the new assertion:
Finally, retrieve the federation metadata URL:
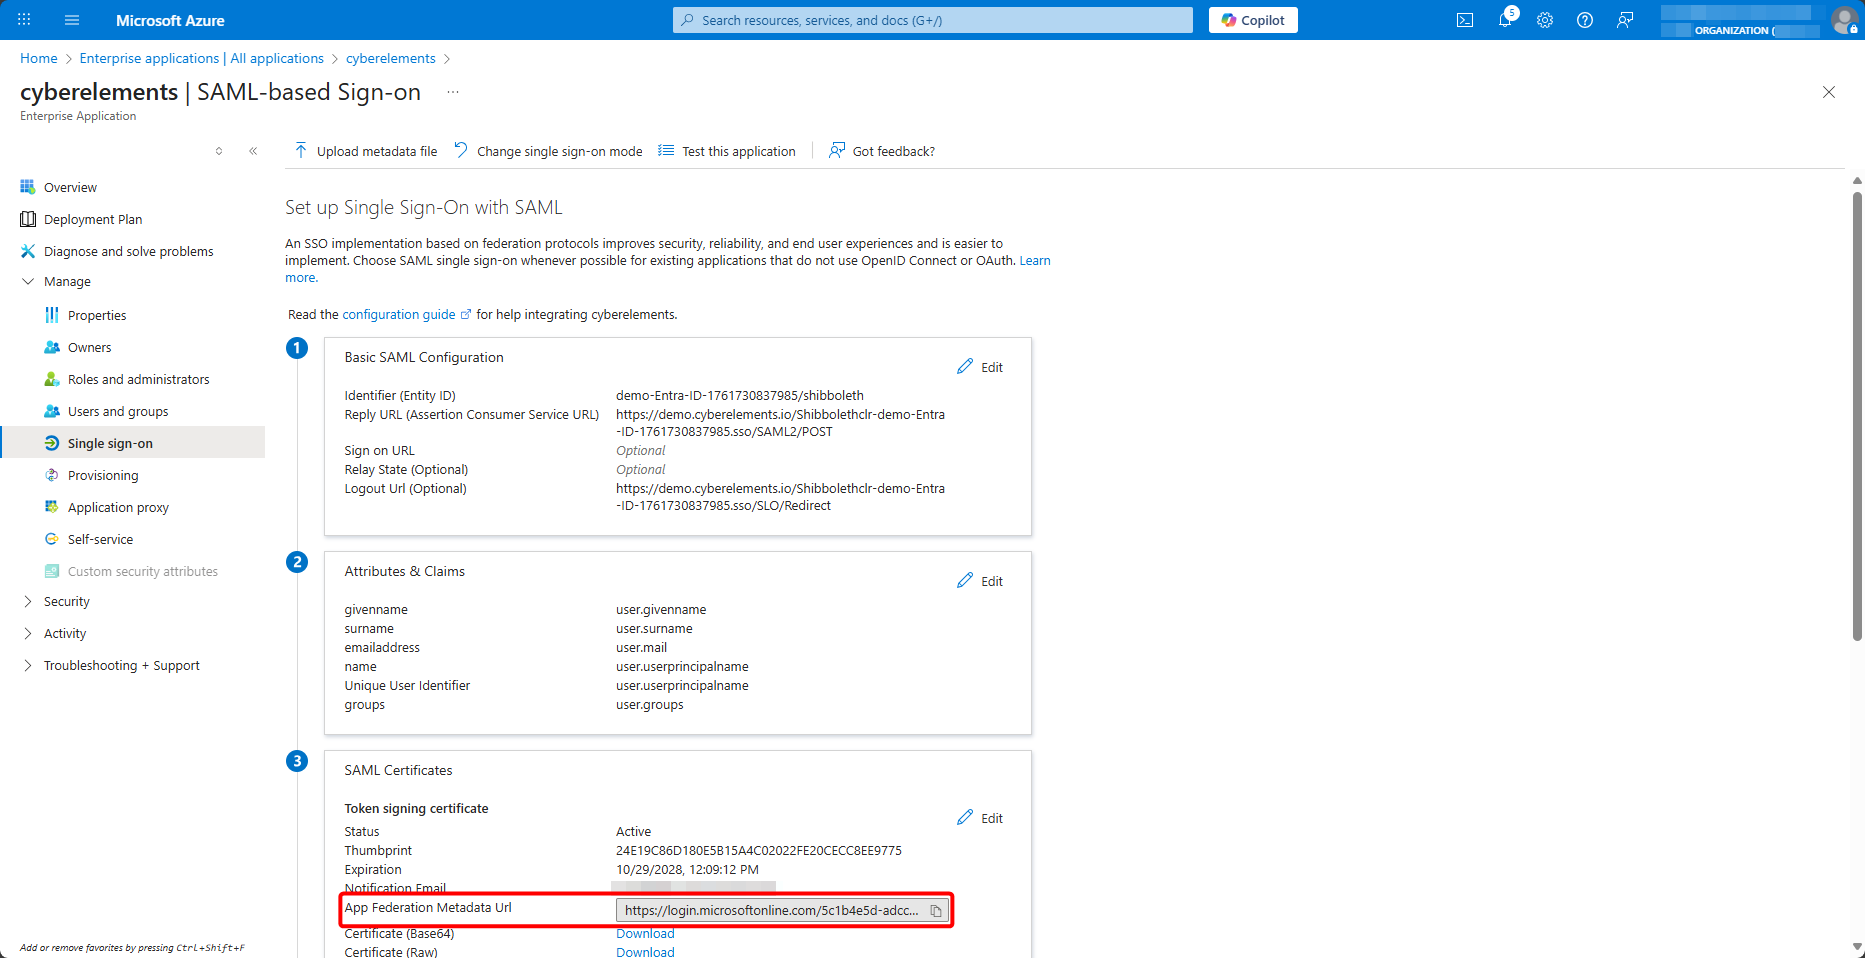
Return to the cyberelements.io administration console and add the federation metadata URL:
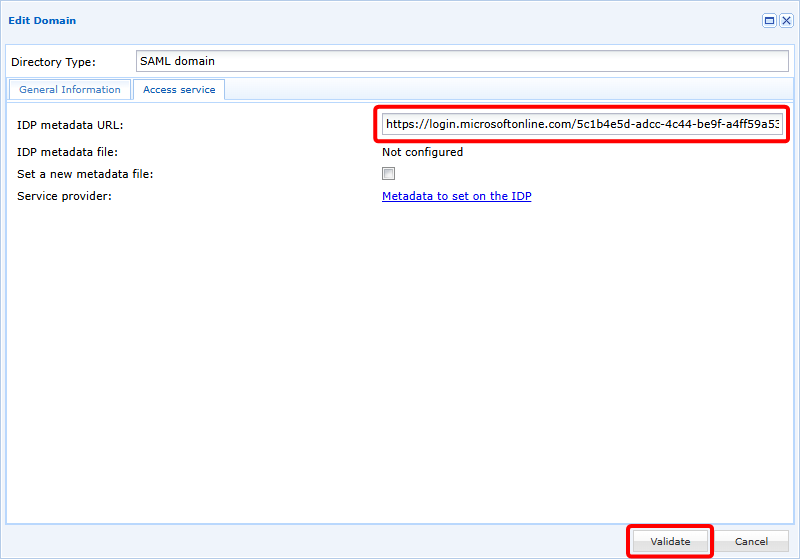
Once validated, your new SAML domain is ready to use.
Adding groups
The new SAML domain is directly usable, but because SAMLv2 does not provide for direct exchanges between the Identity Provider (IDP) and the Service Provider (SP), which in our context is cyberelements.io, it cannot know about the user groups present on Entra ID.
To overcome this problem, user groups can either be synchronized on an ad hoc basis or added manually to the product.
Ad hoc synchronization
Ad hoc synchronization of Entra ID user groups is possible using the device login Azure feature.
This feature will synchronize all groups present on Entra ID.
To perform this synchronization, open the list of available domains and click on the synchronization button:
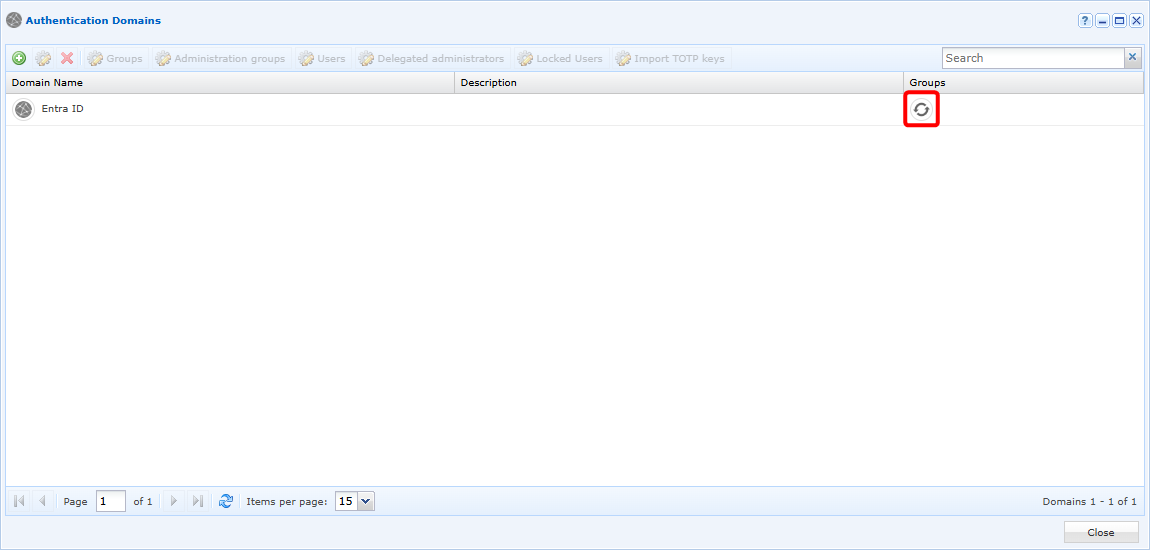
A window will open in which you will need to copy a code and paste it into the Azure authentication accessible via the link provided:
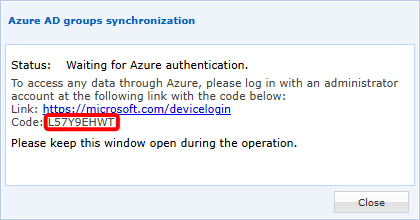
After authentication, cyberelements.io will synchronize all groups to make them usable in the solution. Depending on the number of groups to be synchronized, the operation may take up to 5 minutes (for thousands of groups to be synchronized).
Manually
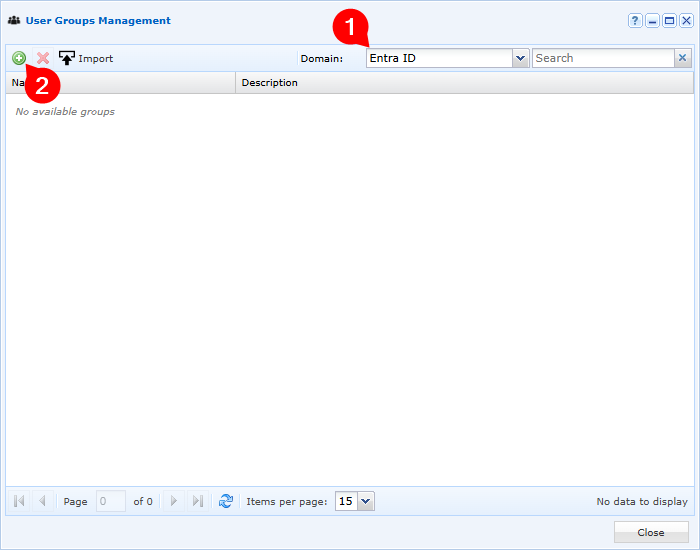
Open the user group management:
Select your Entra ID domain and click on the add button:
Finally, fill in the various fields to add a group present on Entra ID:
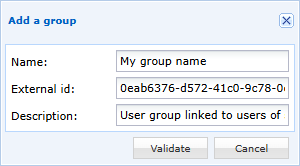
- Enter the display name of your user group in cyberelements.io (to simplify management, it is recommended to name it the same as on Entra ID)
- Specify the ID of the group object, which can be retrieved from Azure group management
- Optionally, add a description to the user group