Securing access to the Nutanix Prism management console
Information
Version Nutanix Prism : NCC Version 4.6.0.1
This page will provide instructions on how to grant access to the Nutanix Prism administration console for secure access via cyberelements.io or cyberelements Cleanroom.
It will also show how to configure credential injection so that the user does not need to know the credentials.
Creating an alias in the vault
For this example, a service account will be injected to enable authentication to Nutanix Prism.
First, open the integrated vault in cyberelements.io or cyberelements Cleanroom:
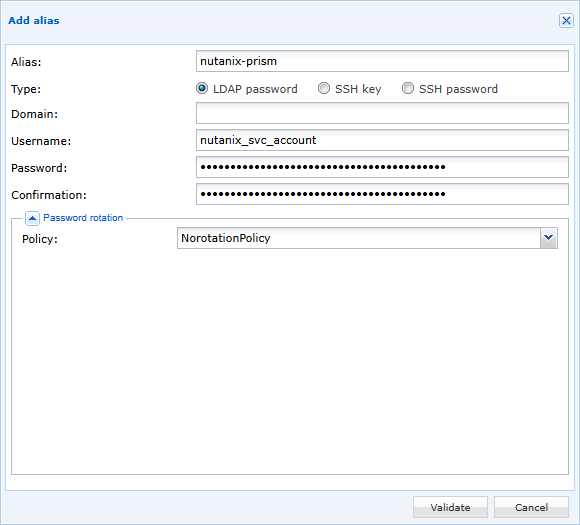
Then add a new alias, with a name of your choice, of type LDAP, filling in the user name and password (make sure that the alias is not subject to an active password rotation policy):
Configuring credential injection
Installing the Cyberelements SSO Configurator extension plugin
In order to retrieve the configuration with the Cyberelements SSO Configurator browser plugin, please install it by following these instructions: Install Cyberelements SSO Configurator
Retrieving the Nutanix Prism Web SSO configuration
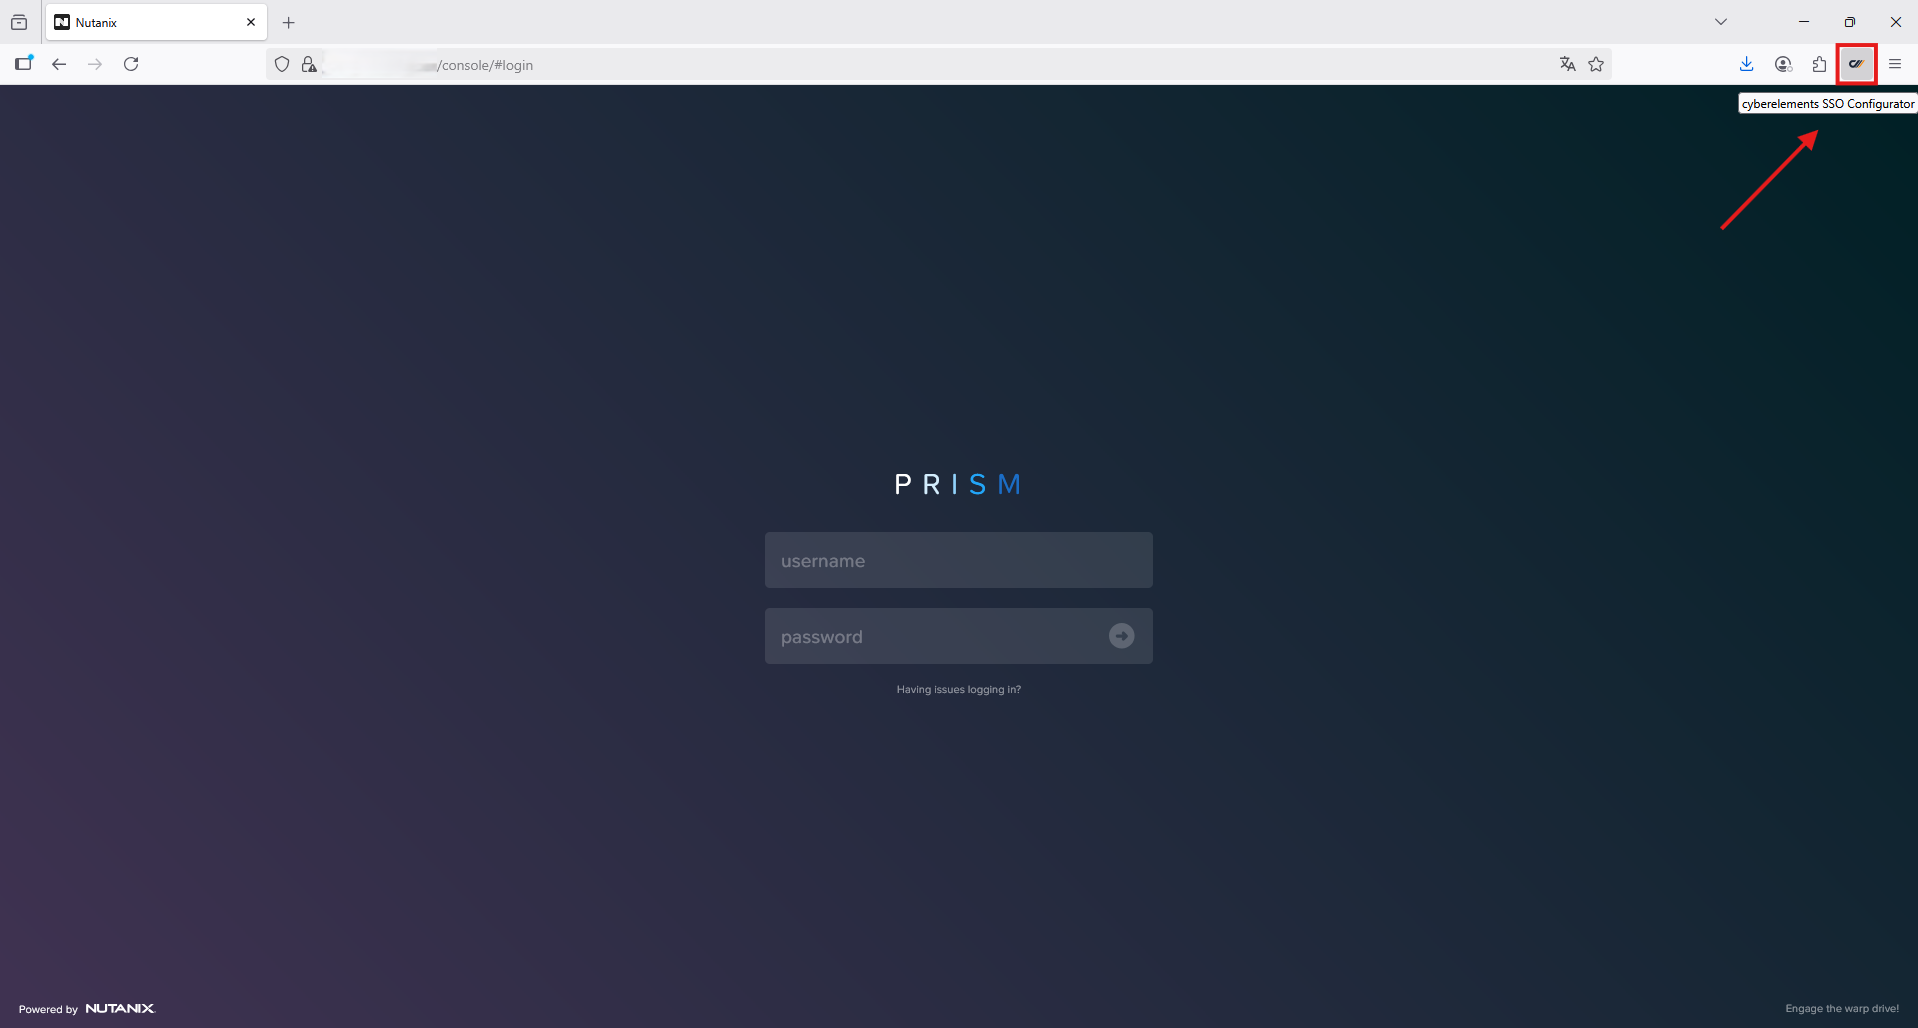
Start by going to the Nutanix Prism login form, then launch the extension by clicking on the  button.
The extension launches in a banner on the left side of your browser with automatic identification of the “Username” and ‘Password’ fields.
Warning!
The warning message “Please select button field” means that the plugin is waiting for manual action to indicate the position of the “login button”.
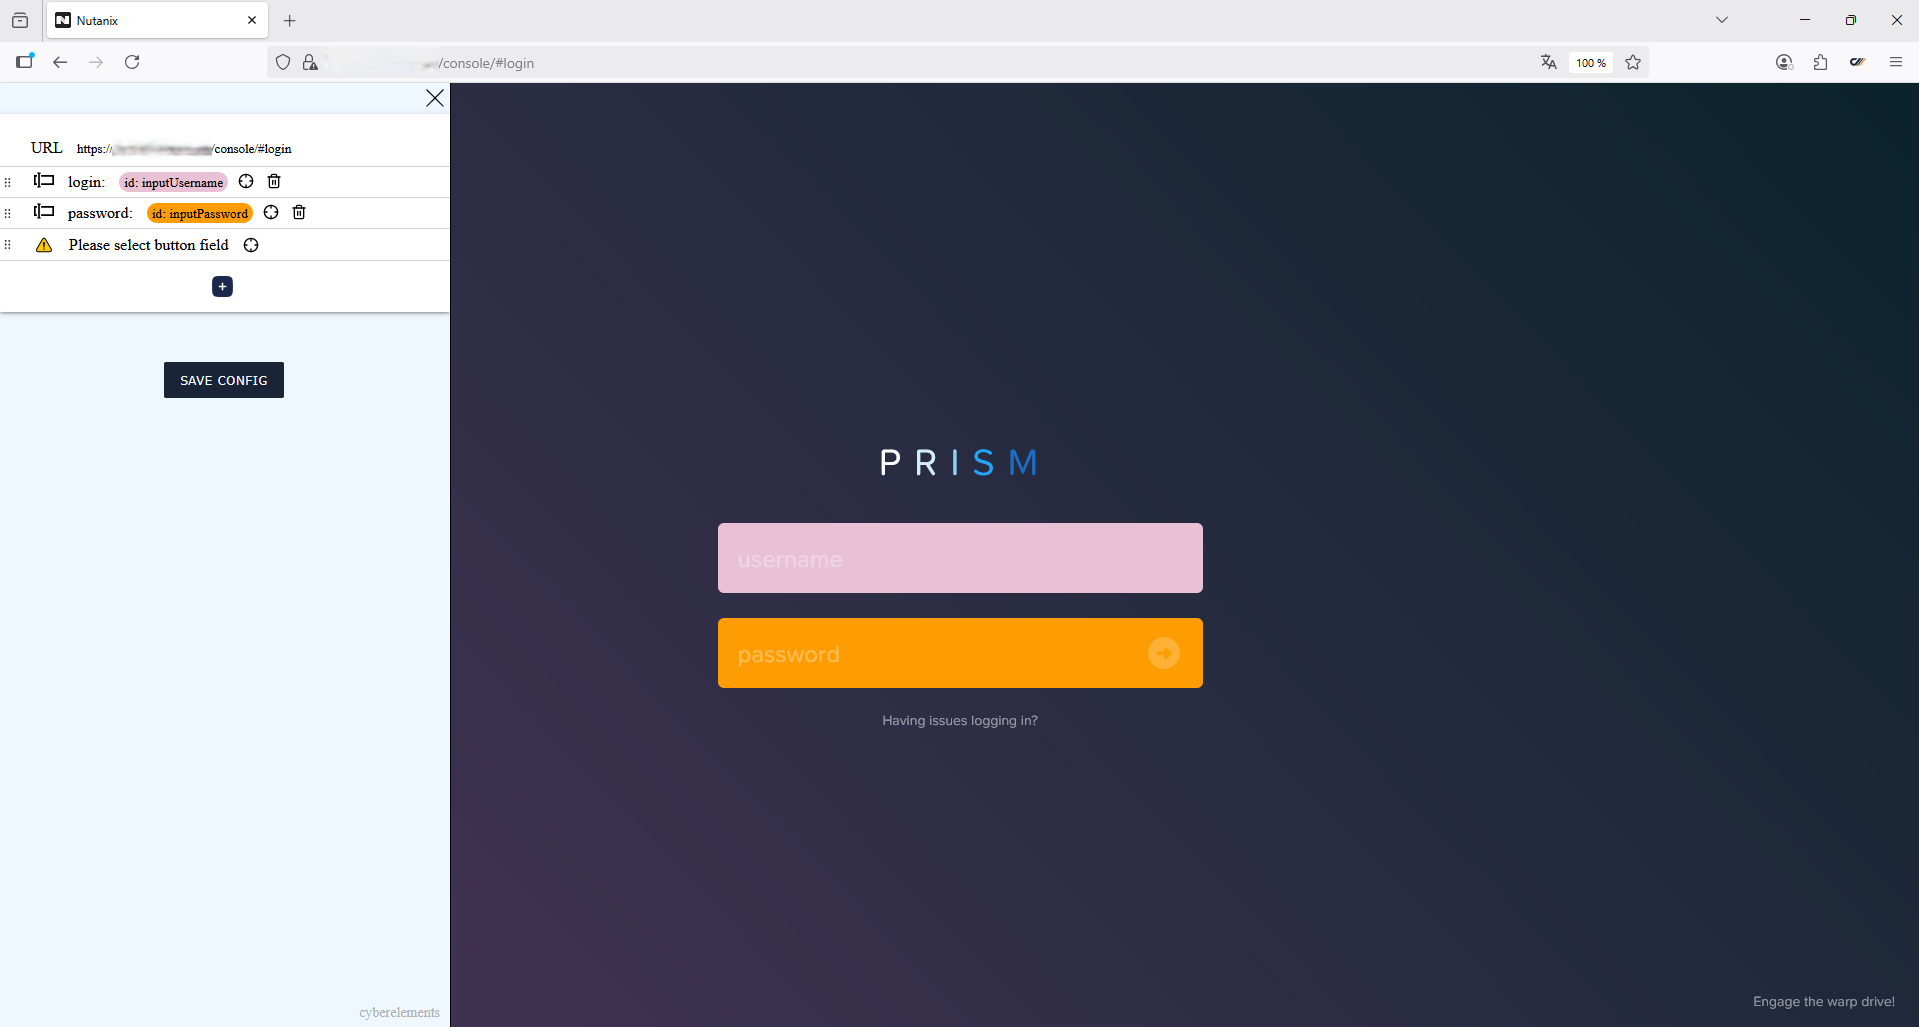
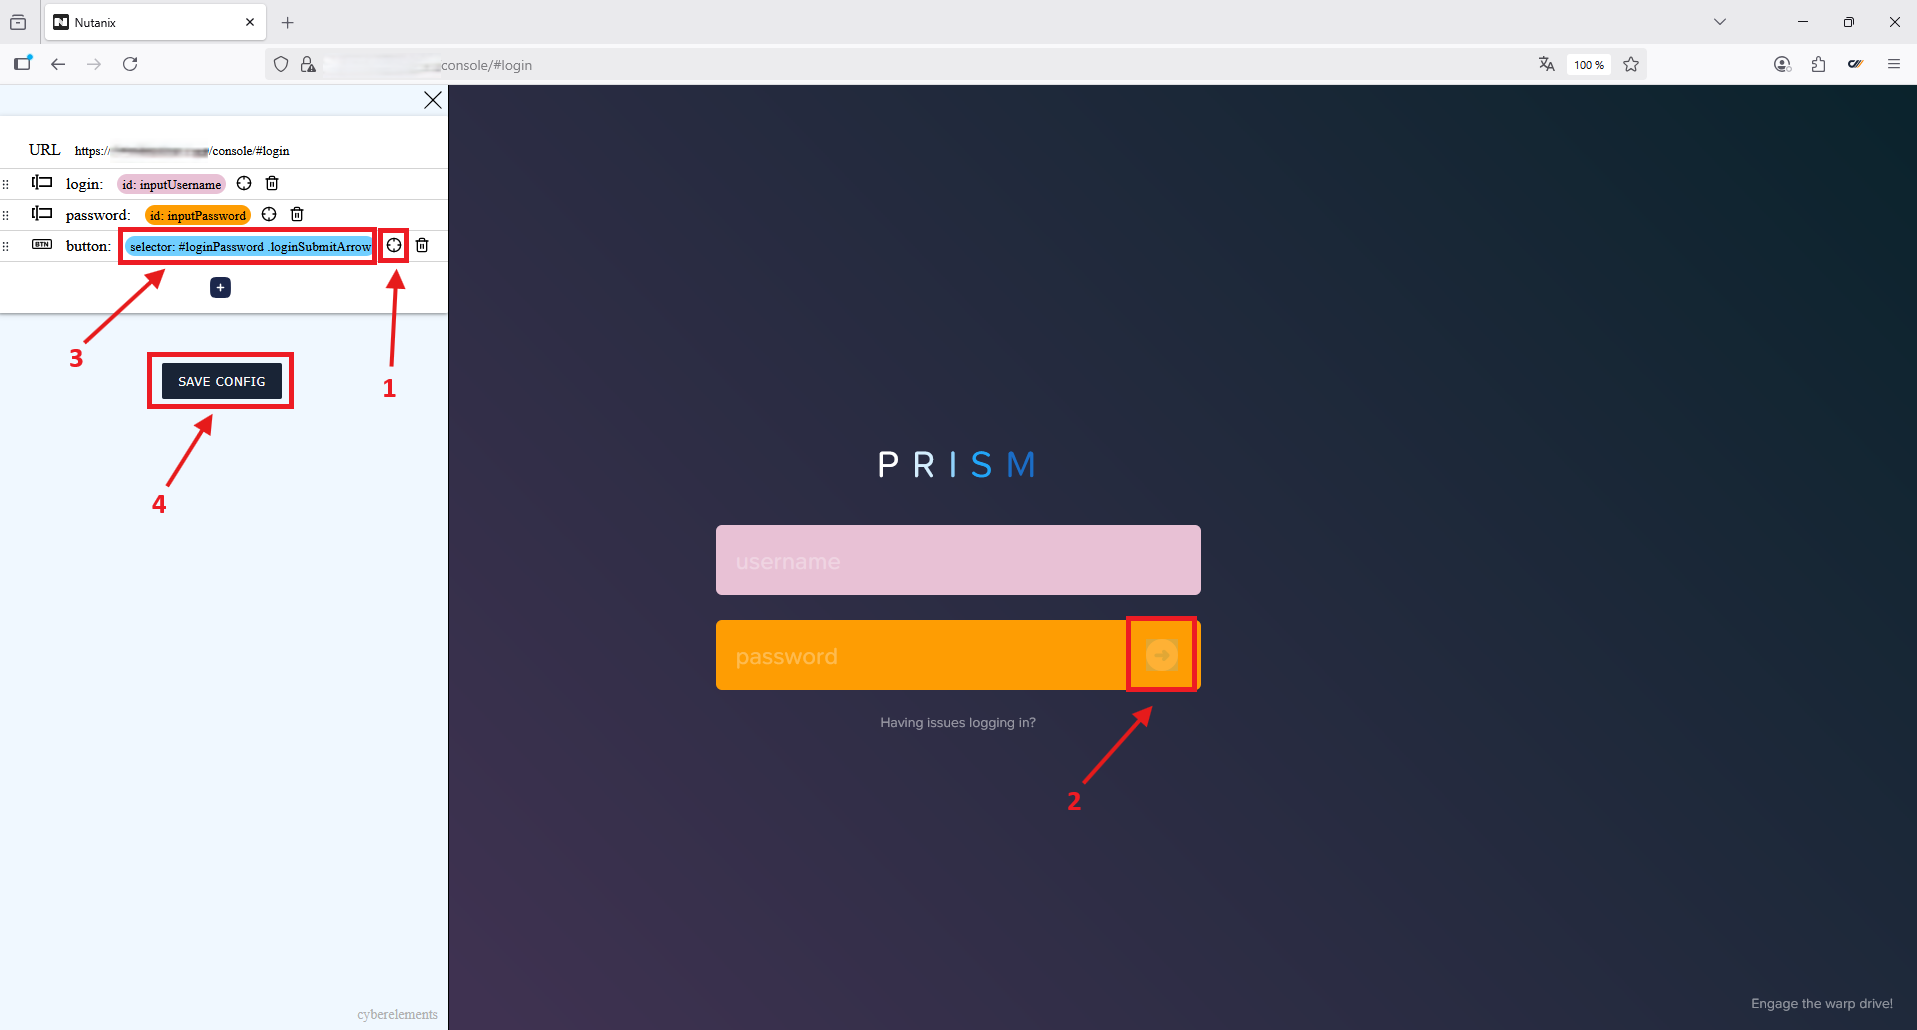
Indicate the position of the “login button” and save the configuration:
- Click on the
 icon
icon - Move the cross-shaped cursor to the location of the “connection button” and click on it
- Indication of the configuration selection of the “connection button” by the plugin
- Click on the
 button to save the configuration to the clipboard
Example
Example of retrieved configuration:
1 2 3 4 5 6 7 8 9 10 11 12 13 14 15 16 17 18 19 20 21 22 23 24 25 26 27 28 29 | |
Web application configuration in cyberelements
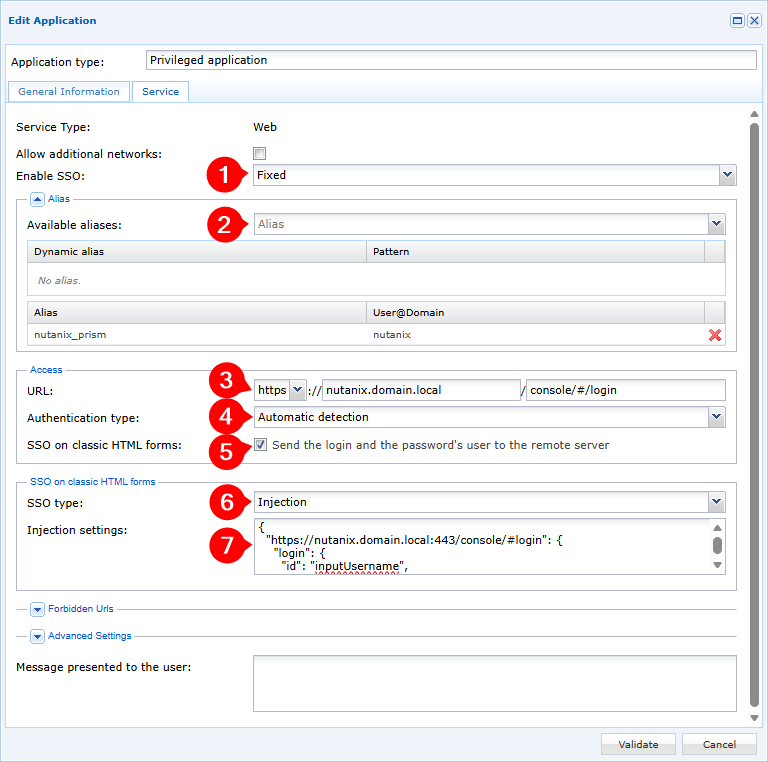
- Select the Fixed option from the SSO activation drop-down menu
- Select the alias in the Vault created for connecting to Nutanix Prism
- Select
httpsfrom the URL type drop-down menu, then enter the address for connecting to Nutanix Prism - Select Automatic Detection from the authentication type drop-down menu
- Check the Sending the user's username and password to the remote server box
- Select
Injectionfrom the SSO type drop-down menu - Paste the configuration previously generated by the
Cyberelements SSO Configuratorextension plugin
Credential injection is now configured on your Nutanix Prism web application, which is protected by cyberelements.io or cyberelements Cleanroom.